Add Documents to a CDM Stage
This guide explains how to add documents to a Collaborative Document Management (CDM) stage within your project template. Adding documents at this stage ensures that the right materials are included for collaboration, review, and approval—streamlining your document workflow and reducing the need for manual uploads during project execution. By preloading documents into the CDM stage, teams can begin working immediately with the most up-to-date and relevant files.
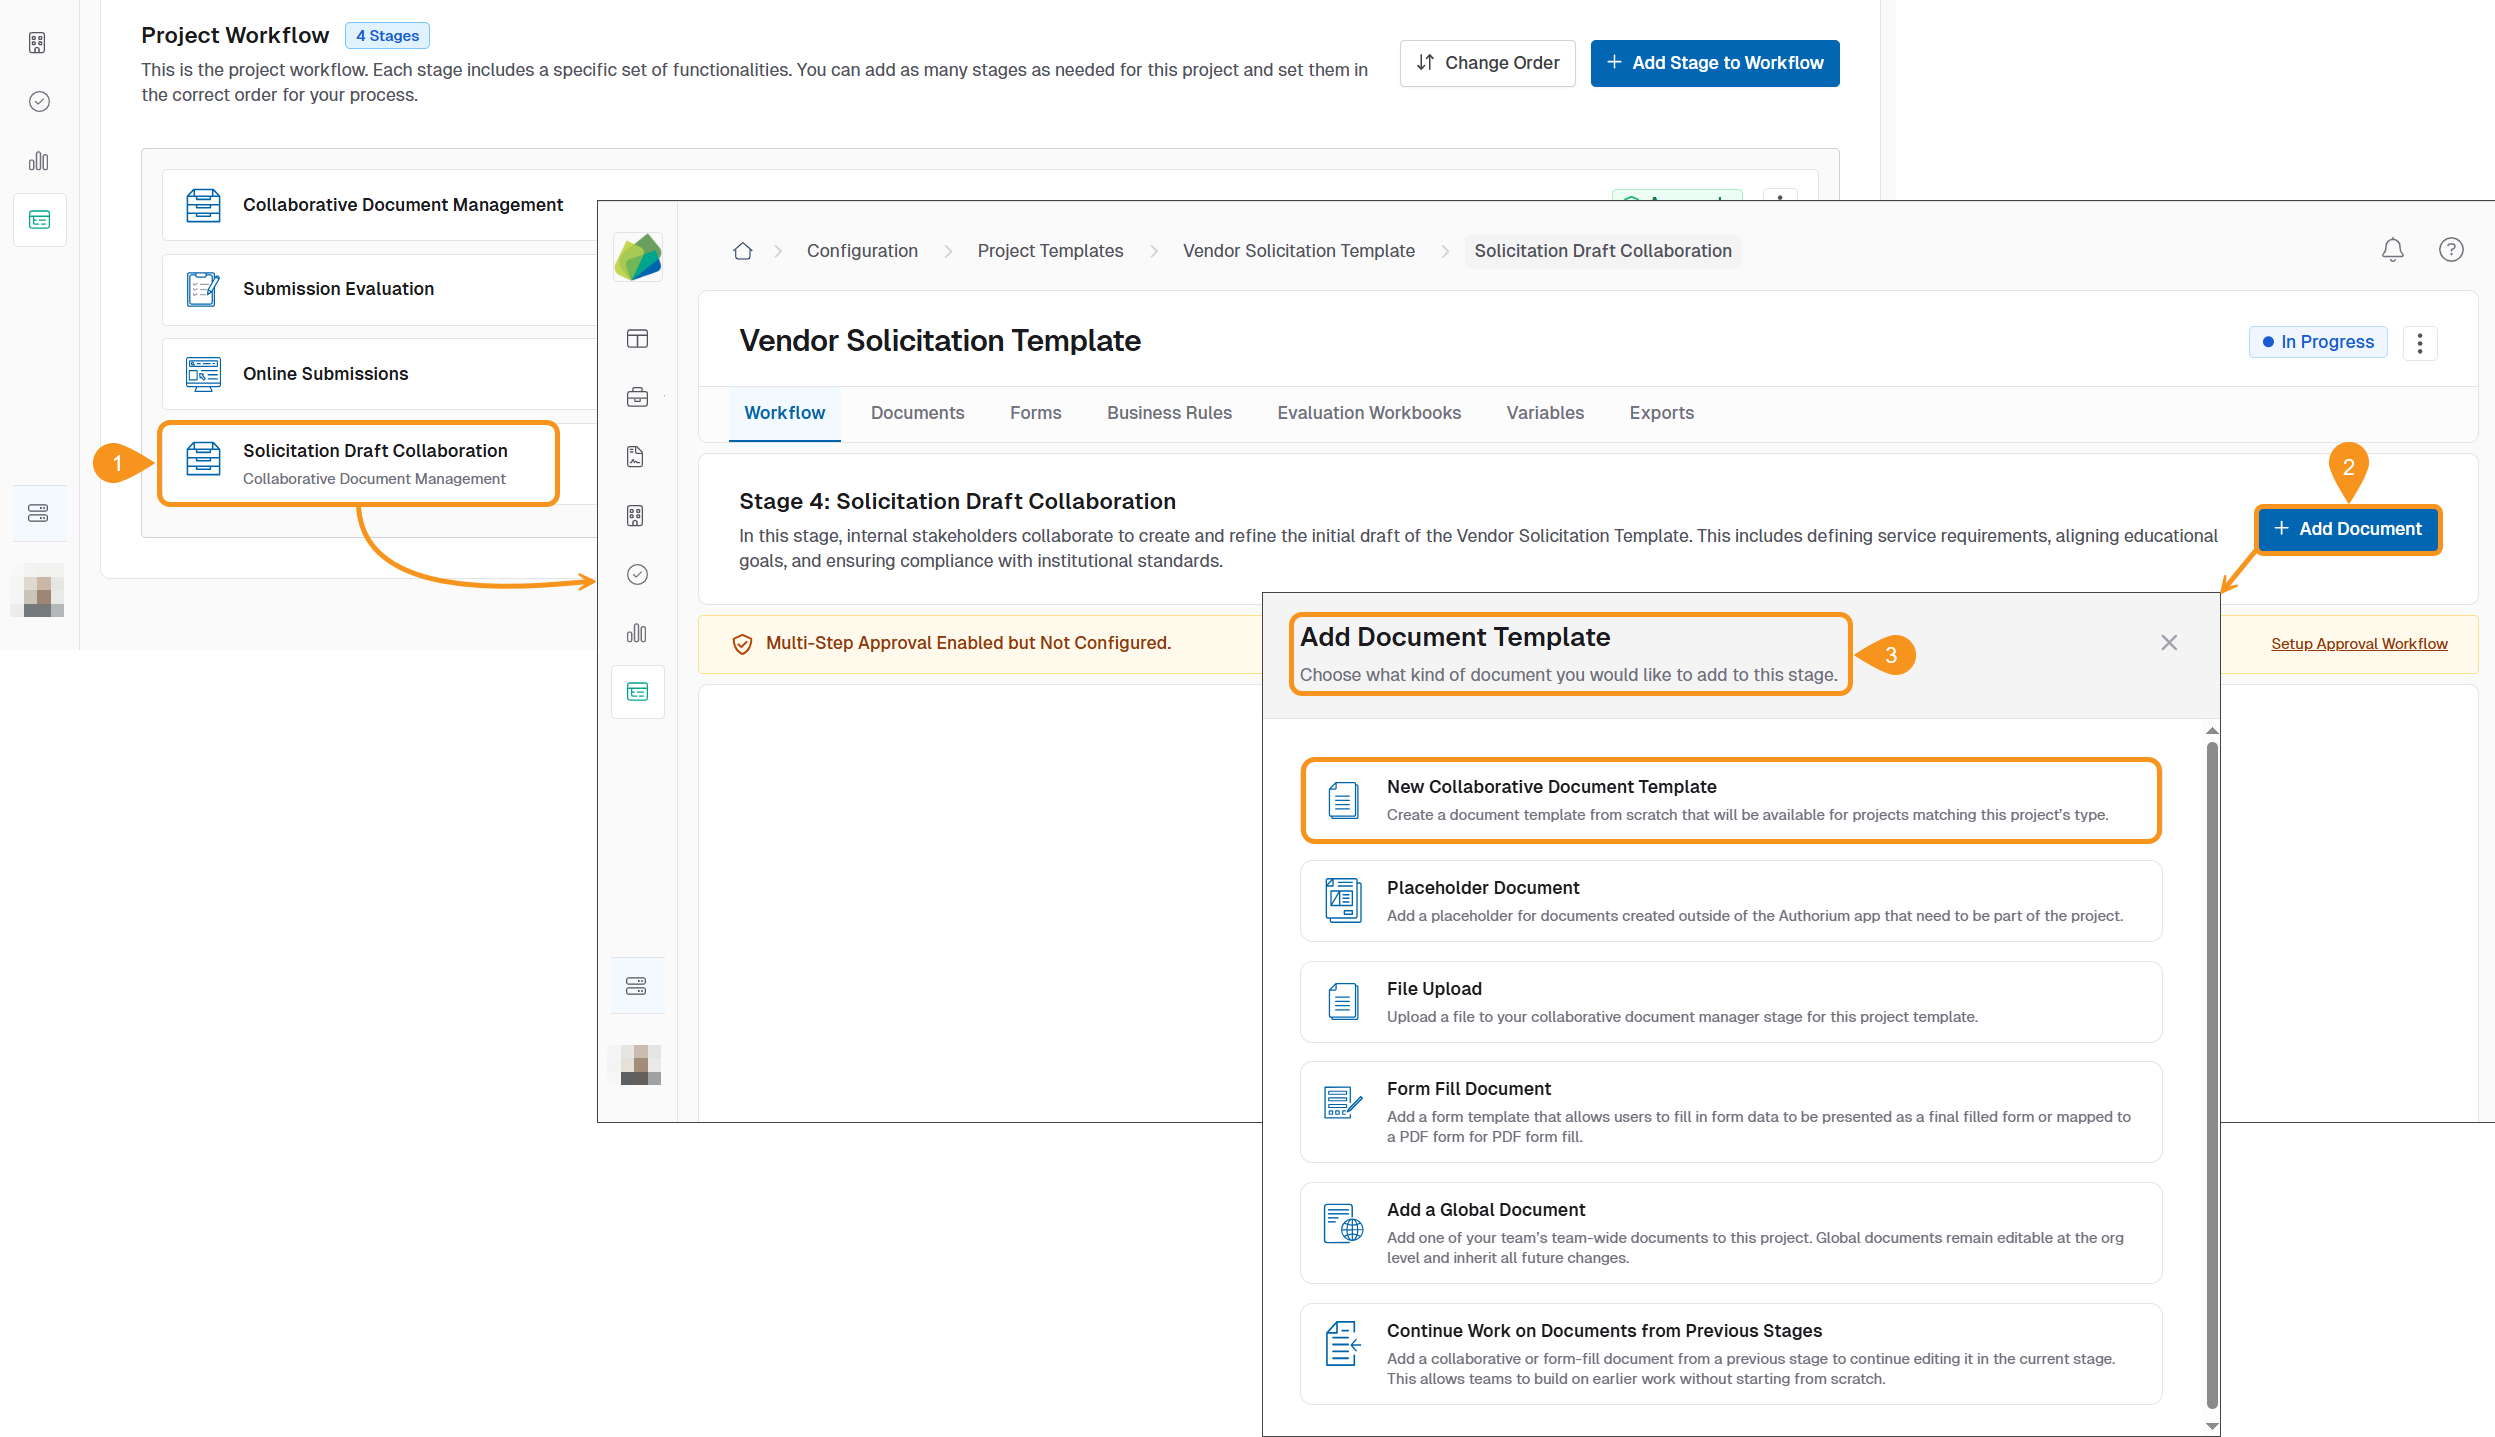
Find below the types of documents you can add to a CDM Stage:
- New Collaborative Document Template – Create a document from scratch for this project type.
- Placeholder Document – Reserve space for documents created outside the platform.
- File Upload – Upload existing files directly into the CDM stage.
- Form Fill Document – Add interactive form templates that users can complete or map to PDFs.
- Global Document – Include organization-wide documents that stay updated across projects.
- Continue Work from Previous Stages – Carry forward collaborative or form-fill documents to continue editing in this stage.
When to Add Documents to a CDM Stage
You should add documents to a CDM stage when you need to:
- Ensure that key templates, forms, or files are readily available for team collaboration.
- Minimize repetitive manual uploads by preloading documents based on project type.
- Maintain consistency across projects by using standardized document sets.
- Enable faster collaboration and approvals by having relevant documents in place from the start.
- Support document continuity by allowing edits on documents from earlier stages.
To Add Documents to a CDM Stage
- Access the Project Template to which you want to add a document.
- Click + Add Document. A modal window with all the available options will open.
- Select the Document Template of your preference.
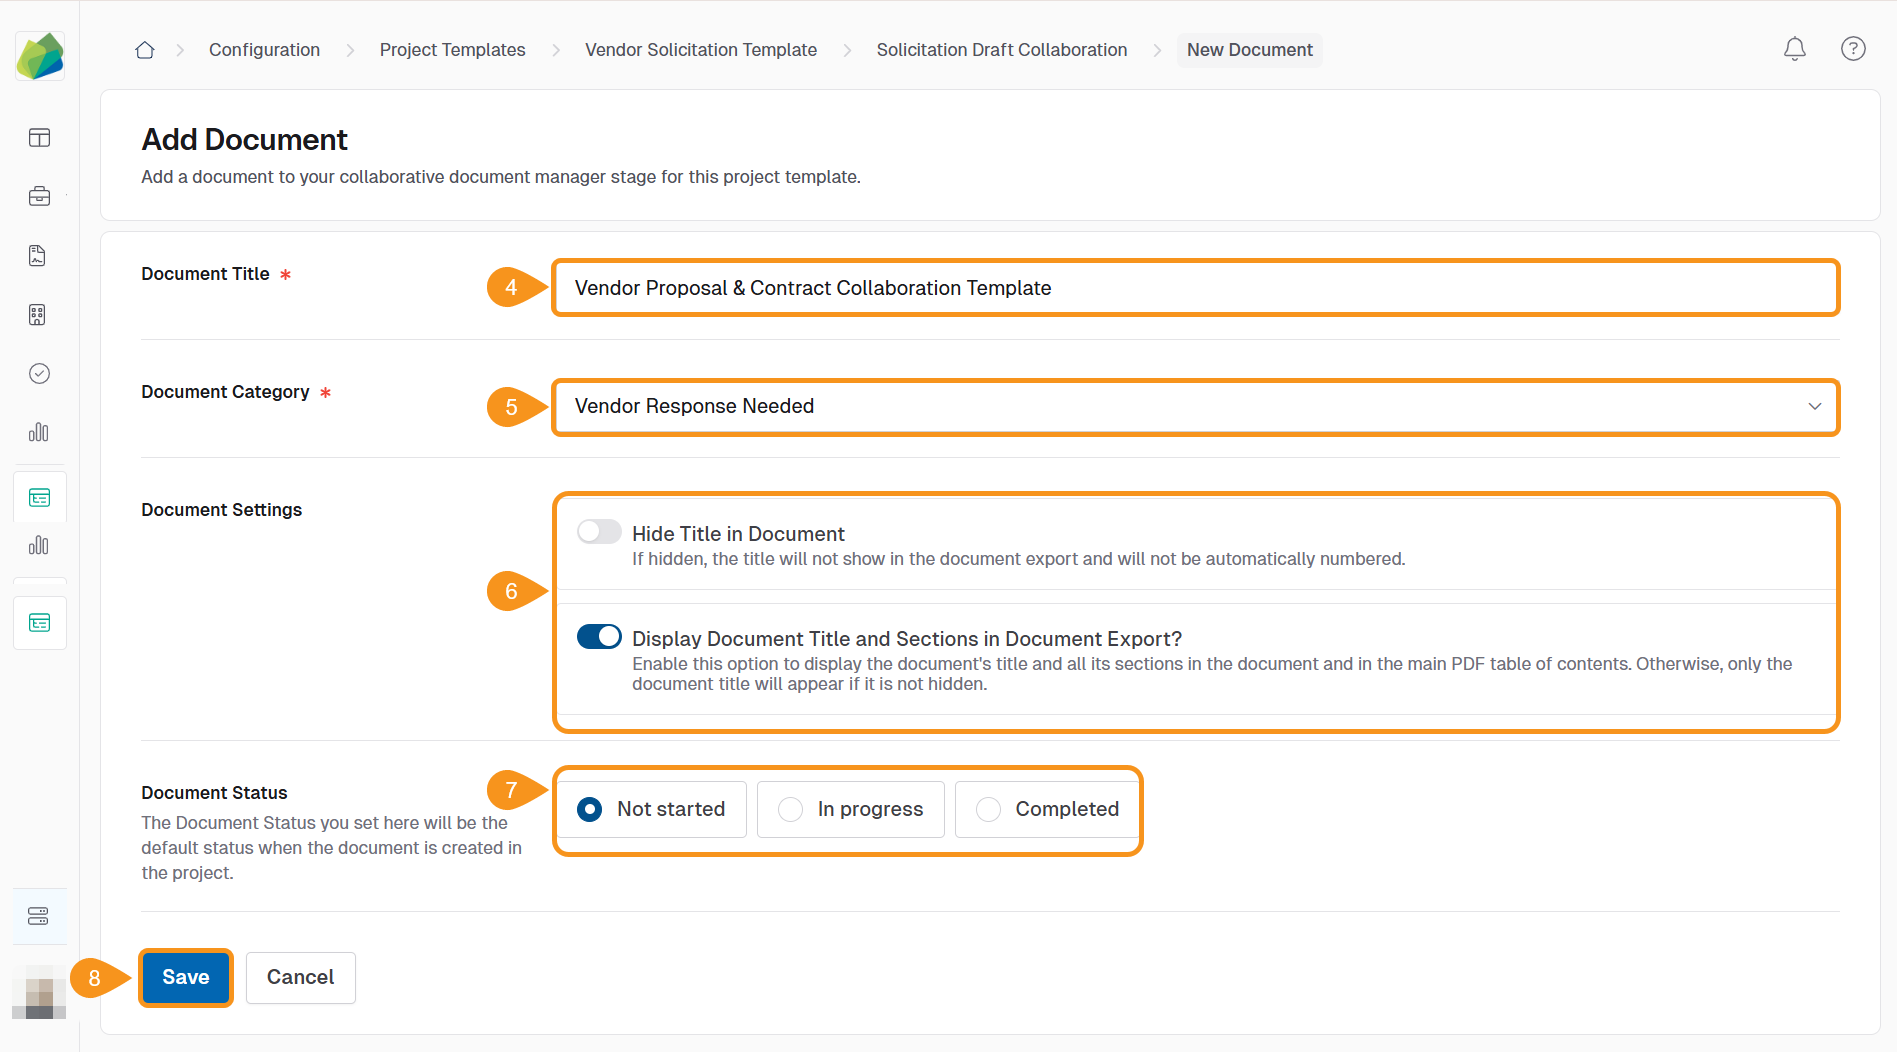
- Add the Document Title.
- Select the Document Category.
- Apply Document Settings:
- Hide Title in Document: Leave this toggle off if you want the title to be visible in the document export and automatically numbered. Toggle it on to hide the title.
- Display Document Title and Sections in Document Export?: Toggle right this option to include the document's title and all its sections in the exported document and the PDF table of contents. If disabled, only the document title will appear—if not hidden.
- Choose the Document Status. Select one of the following:
- Not started (default): The document exists but no one has begun working on it yet.
- In progress: The document is currently being drafted, edited, or reviewed.
- Completed: The document is finalized and no further changes are expected.
- Click Save to apply your changes.
See Also
To complement your knowledge of this process, check the following pages: