Enable Multi-Step Approval Routing
This guide explains how to enable Multi-Step Approval Routing (MSA) in a project stage. Enabling MSA lets you add structured approval workflows, where multiple reviewers can approve content in a defined order before the stage is completed.
When to Enable Multi-Step Approval Routing
You should enable Multi-Step Approval Routing when:
- A stage requires input or approval from multiple people or roles.
- The project has a formal review process with sequential sign-offs.
- You want to ensure structured approvals before moving forward.
To Enable Multi-Step Approval Routing
You can enable MSA when creating a stage or by editing an existing one.
When creating a stage
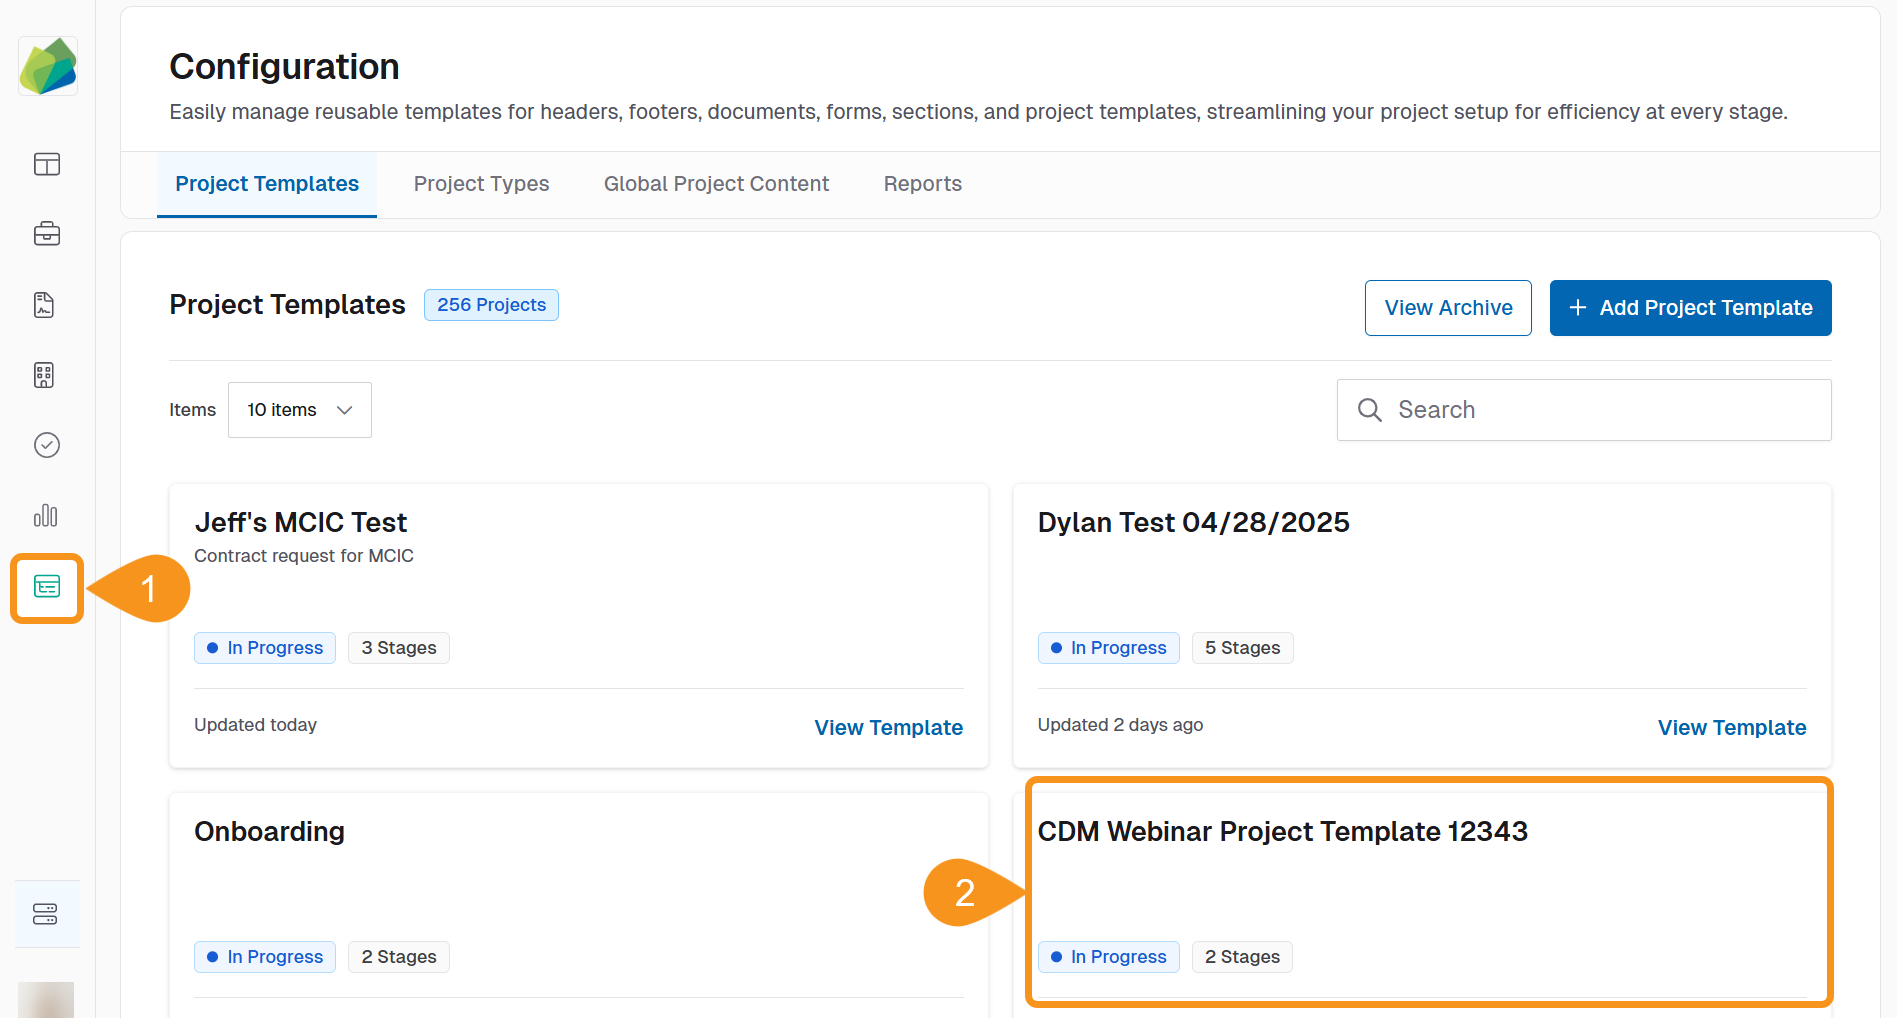
- Click Configuration from the sidebar.
- Select a Project template.
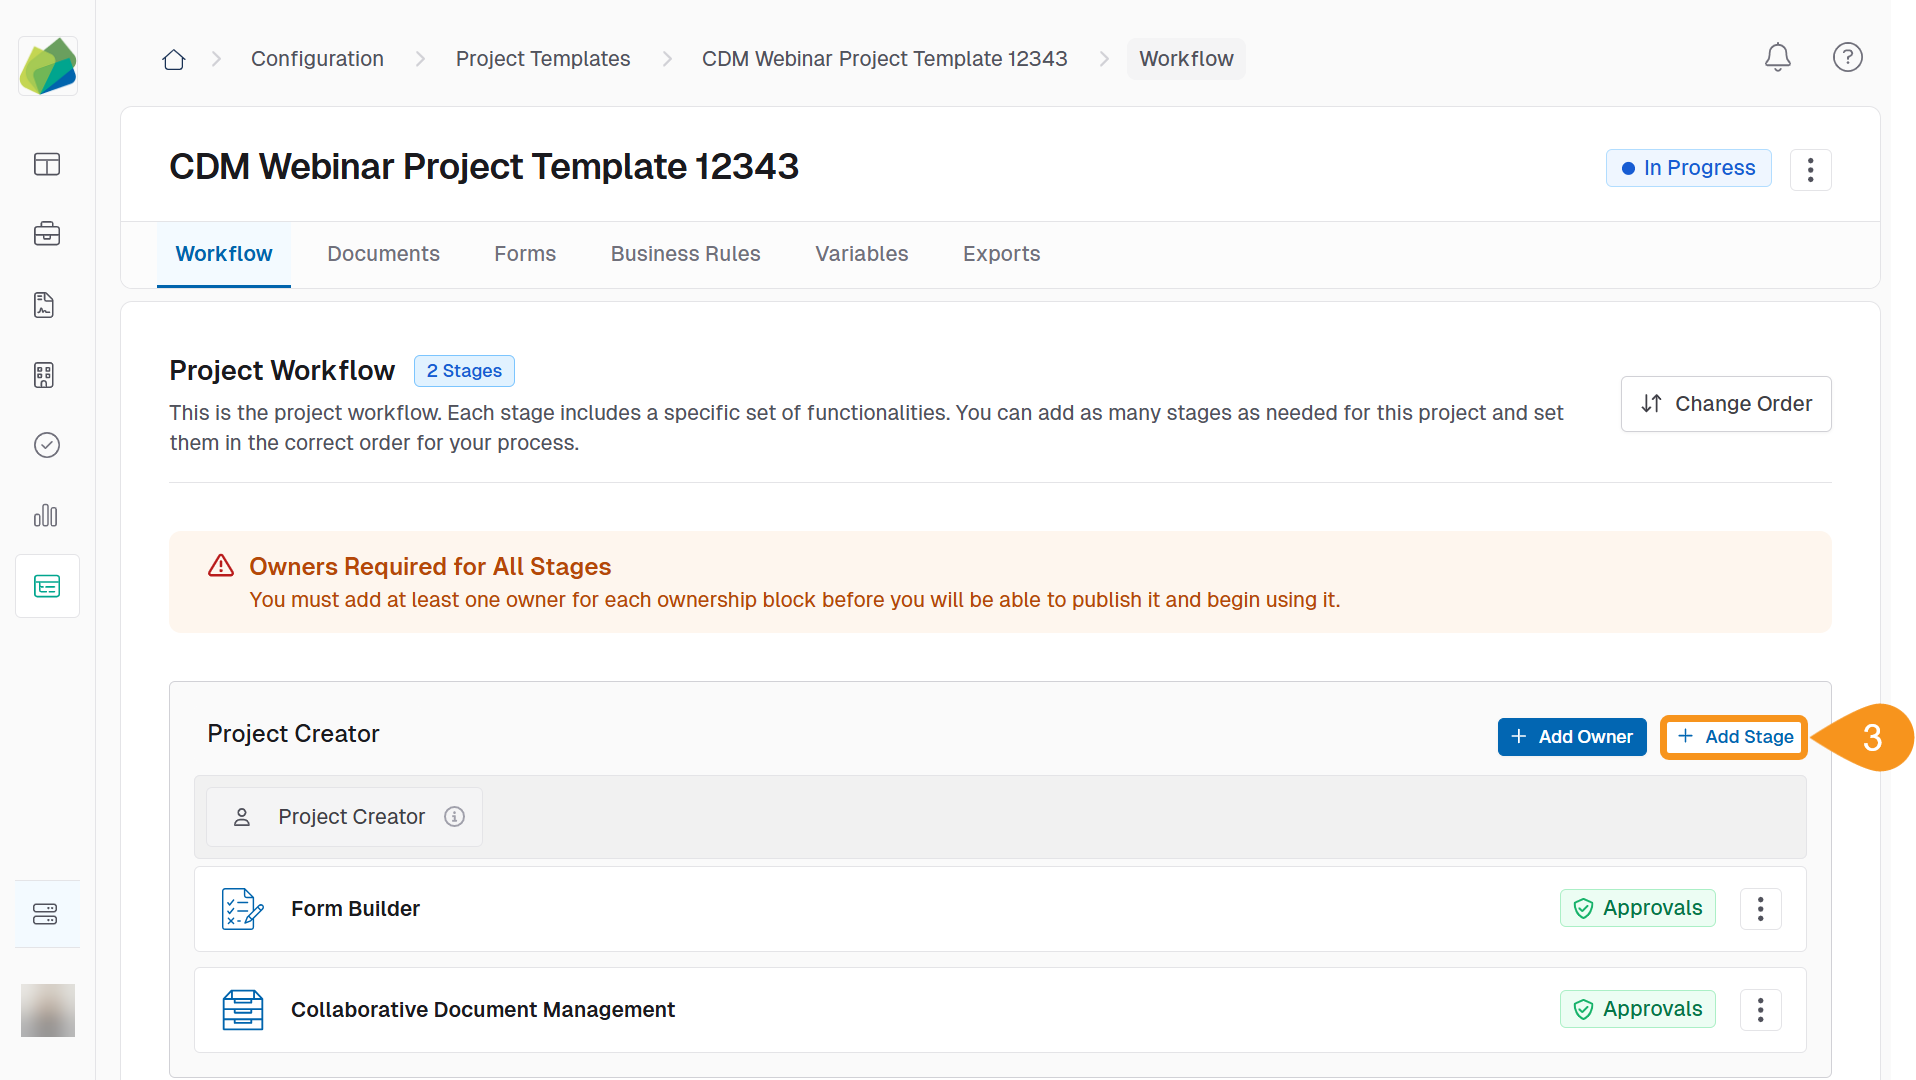
- Click the + Add stage button.
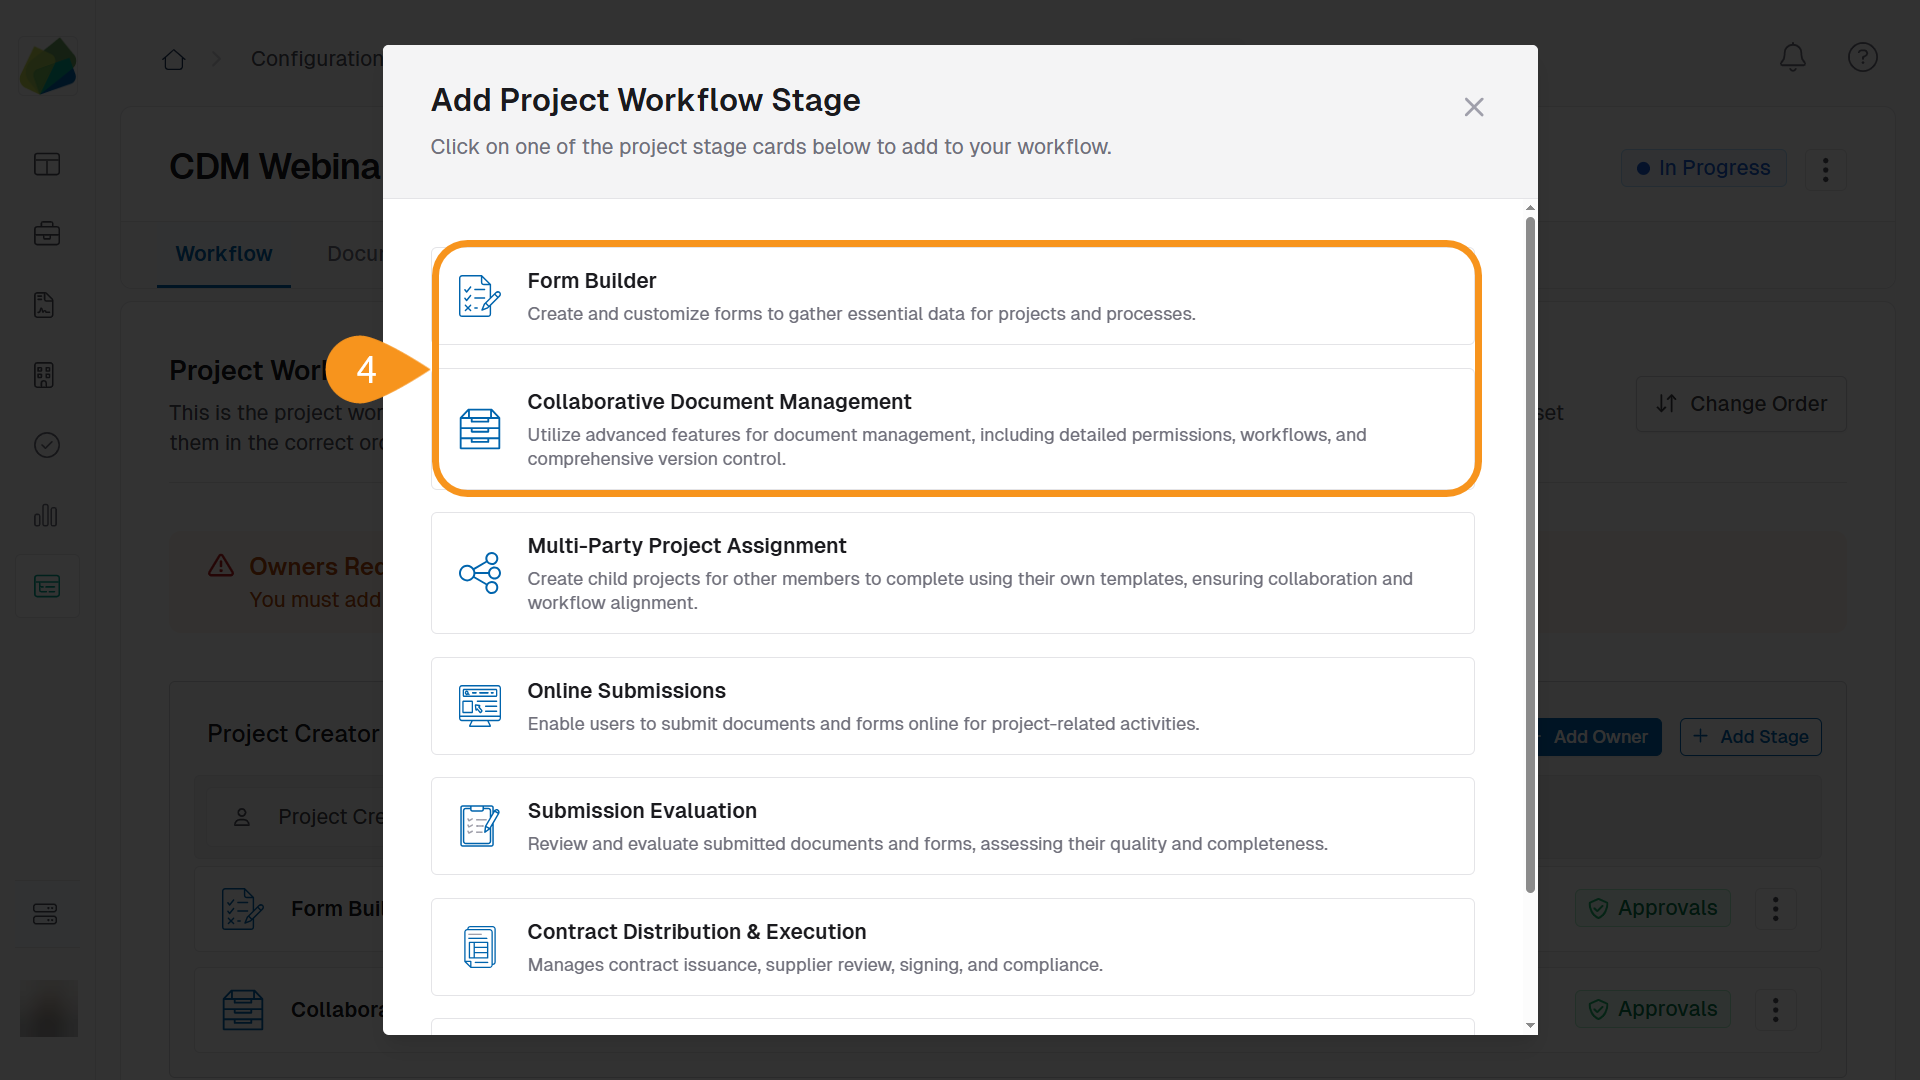
- Select one of the project stage Form Builder or Collaborative Document Management.
- Toggle Enable Multi-Step Approval Routing to ON.
- Click Save stage.
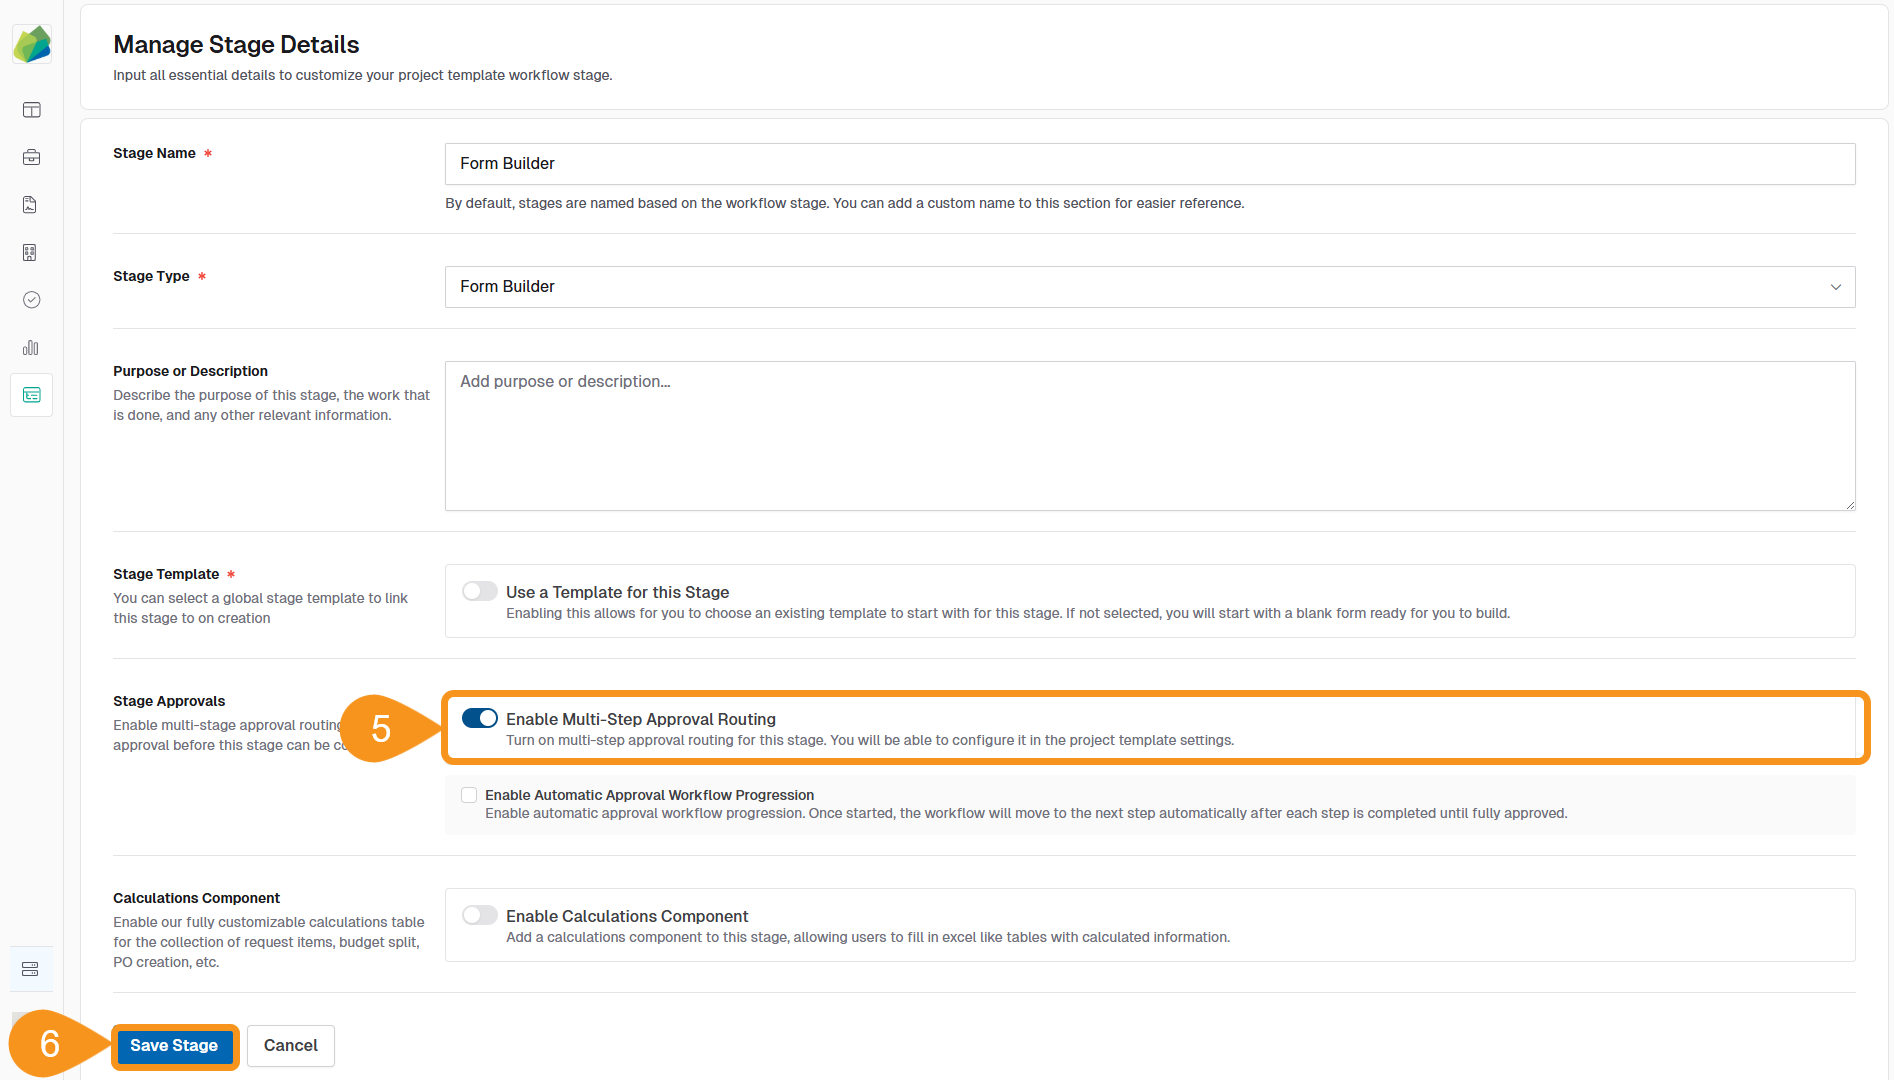
A green Approvals badge appears next to its name.
When editing an existing stage
- Click Configuration from the sidebar.
- Select a Project template.
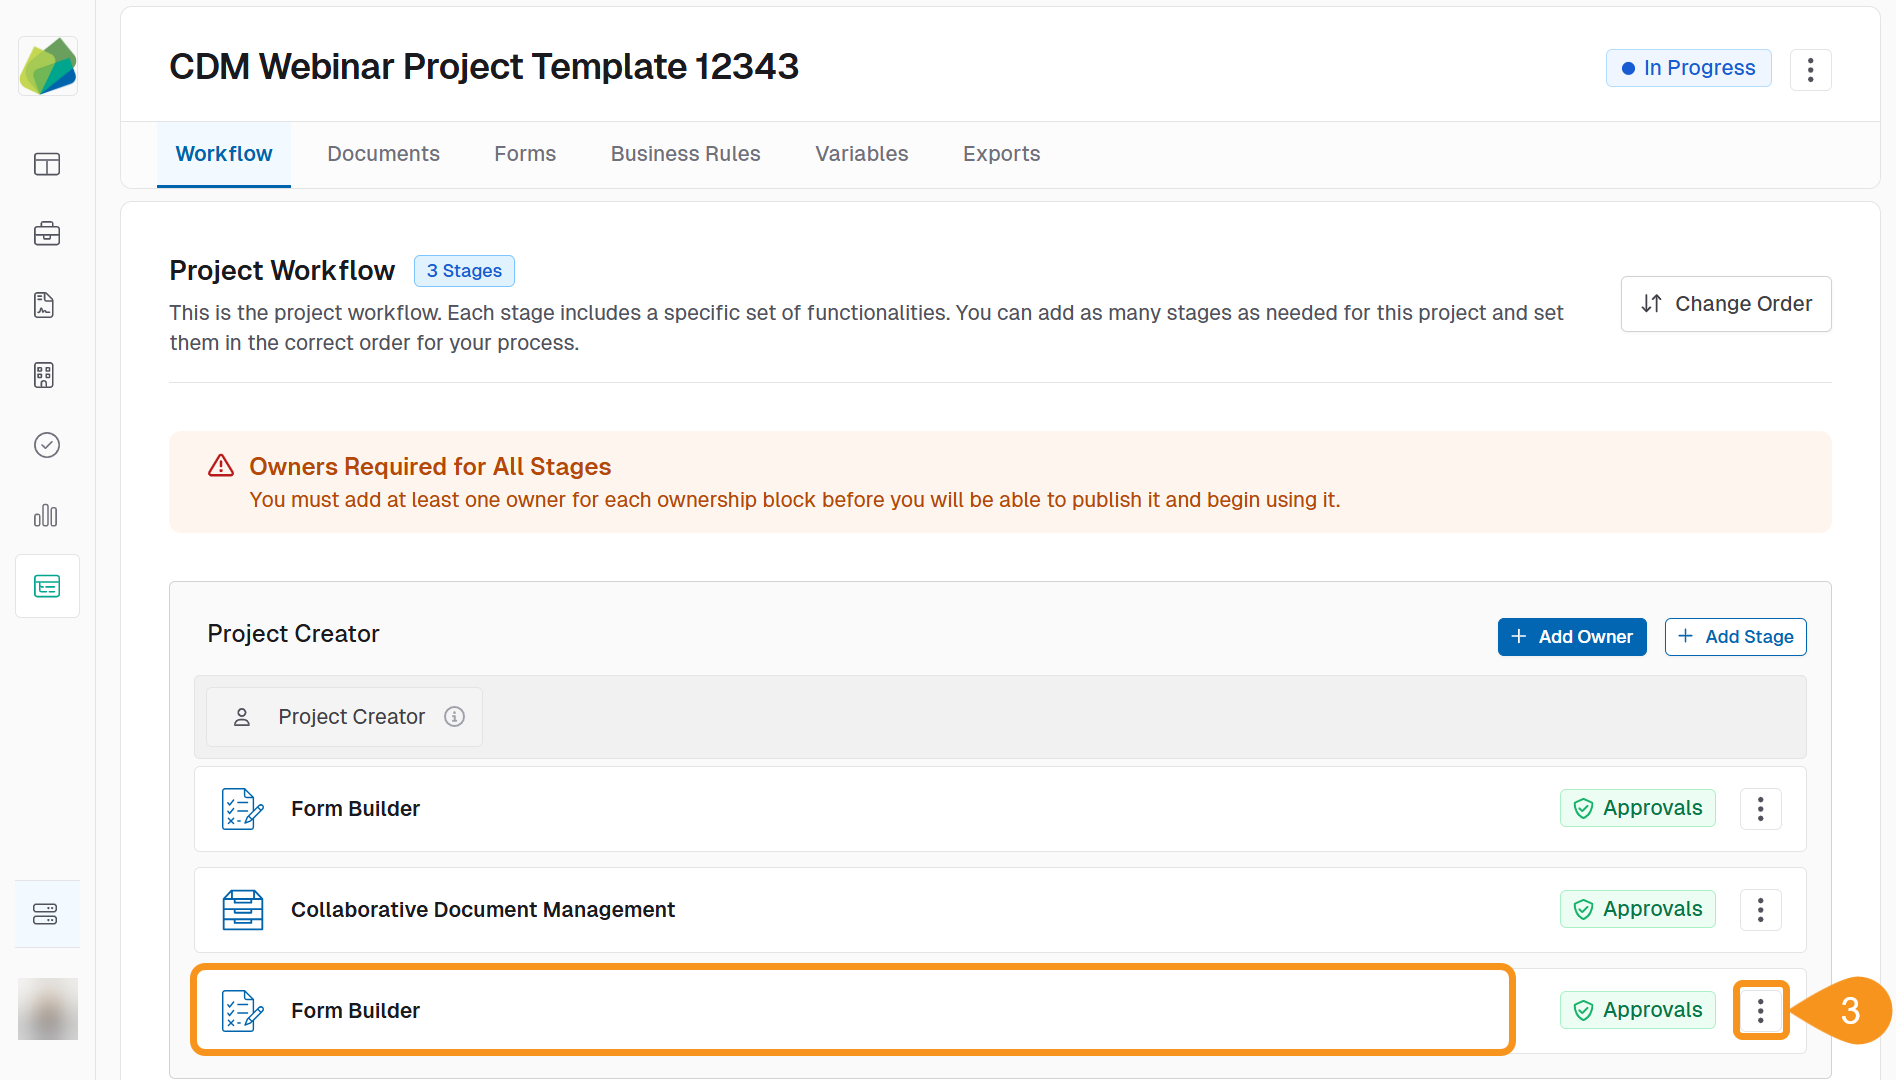
- Locate the stage and click the kebab menu next to the stage name.
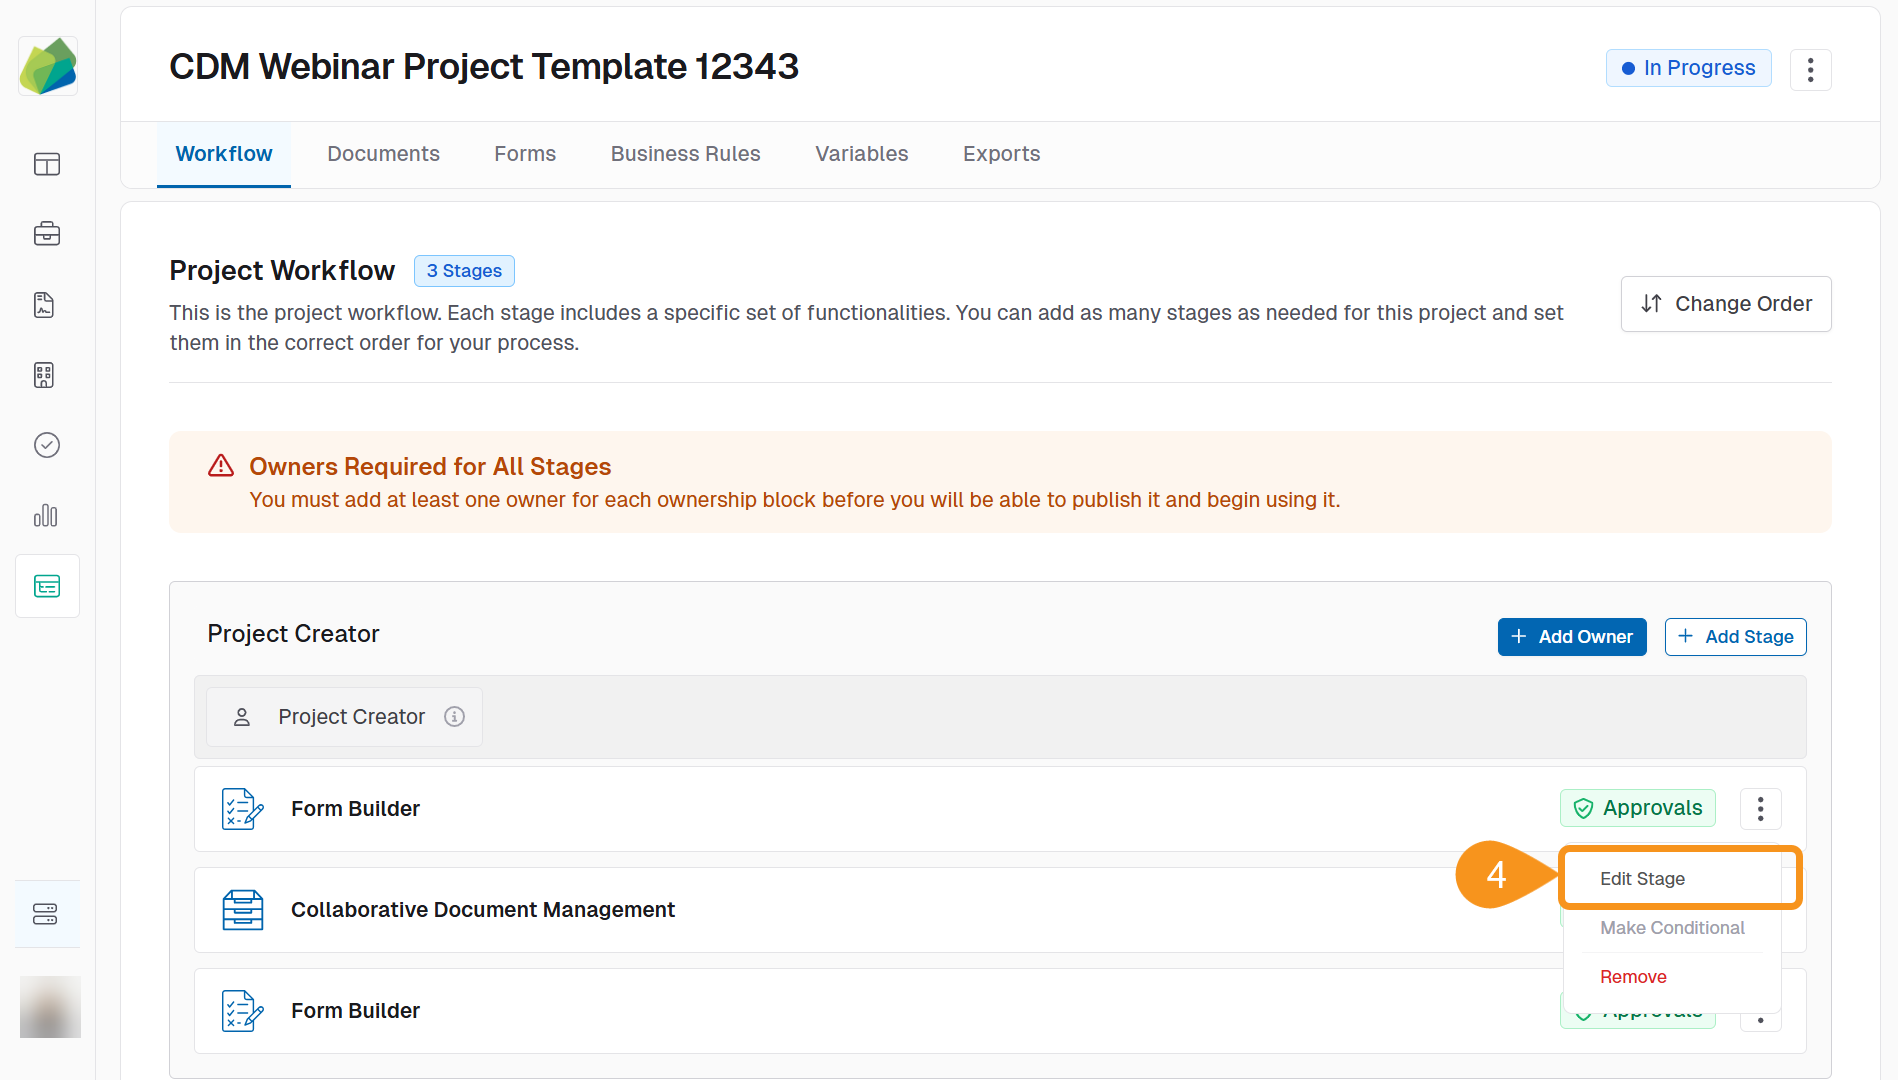
- Select Edit Stage.
- Toggle Enable Multi-Step Approval Routing to ON.
- Click Save Stage.

See Also
To complement your knowledge of this process, feel free to check the following pages: