Requestor flow
This guide explains how to enable and use the requestor workflow in Authorium, which allows external users to initiate projects through a unique link tied to a specific project template. This guide is divided into two main parts based on who is acting:
-
The first steps must be carried out by an authorized internal user from the company, who will enable the external access link and configure the project template.
-
The next steps are completed by the external users, who will access the shared link, validate their credentials, and begin the project using the assigned template.
Enable External Access
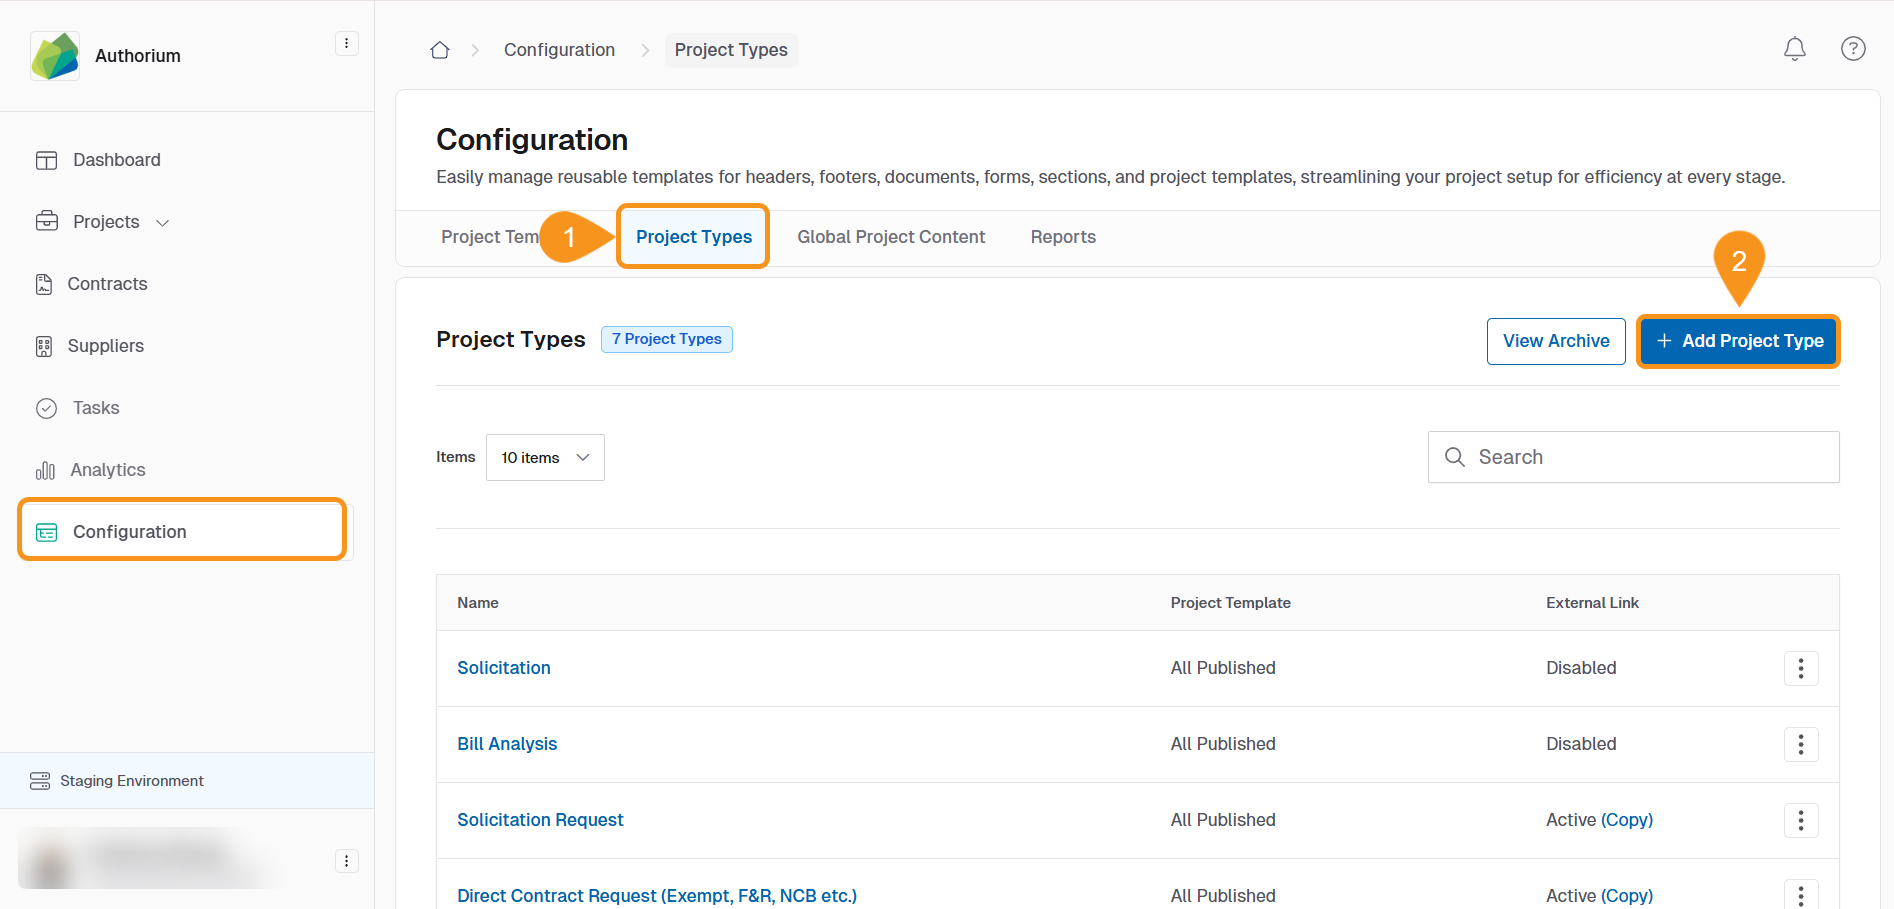
- Go to Configuration > Project Types.
- Select Create a new Project or click to Edit an Existing one.
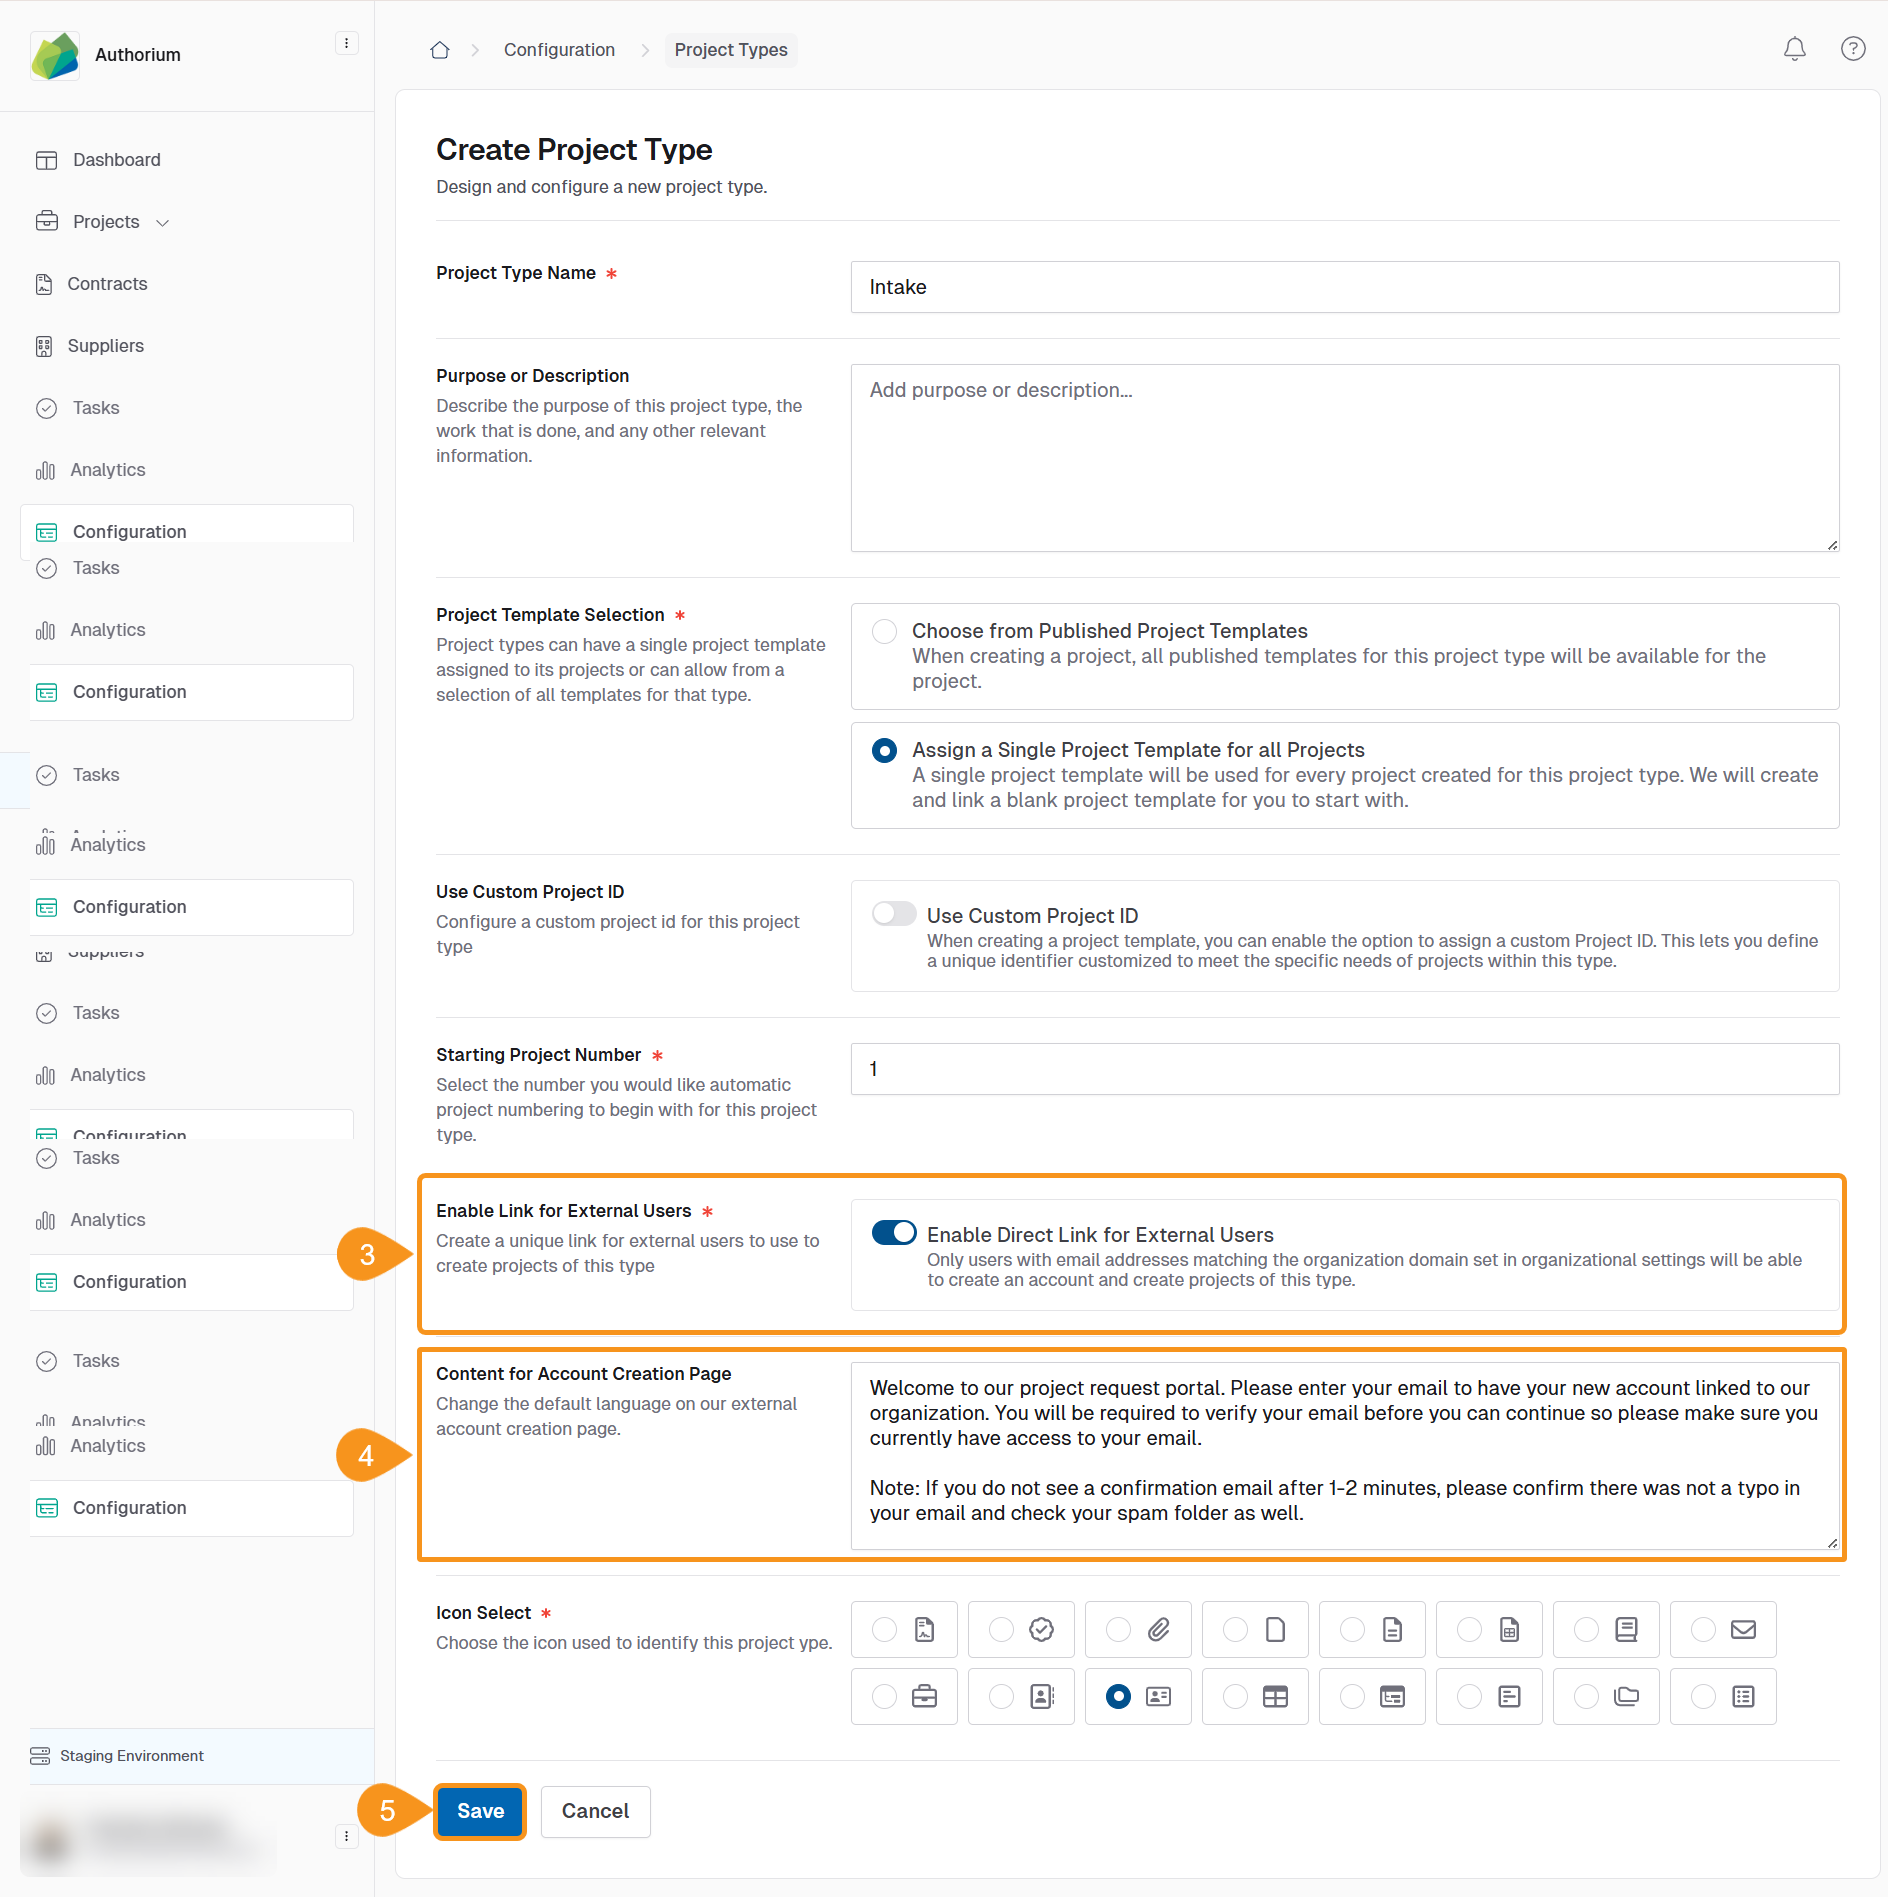
- Within the Project-Type-Setting window, toggle the Enable link for External Users switch on. This will create a unique, shareable link that allows external users to create new projects of the selected type.
This workflow bypasses the traditional request-tracking dashboards or approval queues. Instead, it offers a direct and user-friendly way for external users to start a project with the right template, via a unique link.
- In the Content for Account Creation Page section, enter a relevant message that the external user will see when accessing the link.
- Select Save to apply the changes.
- Click on the Kebab Menu of the corresponding Project Type and select Copy External Link.
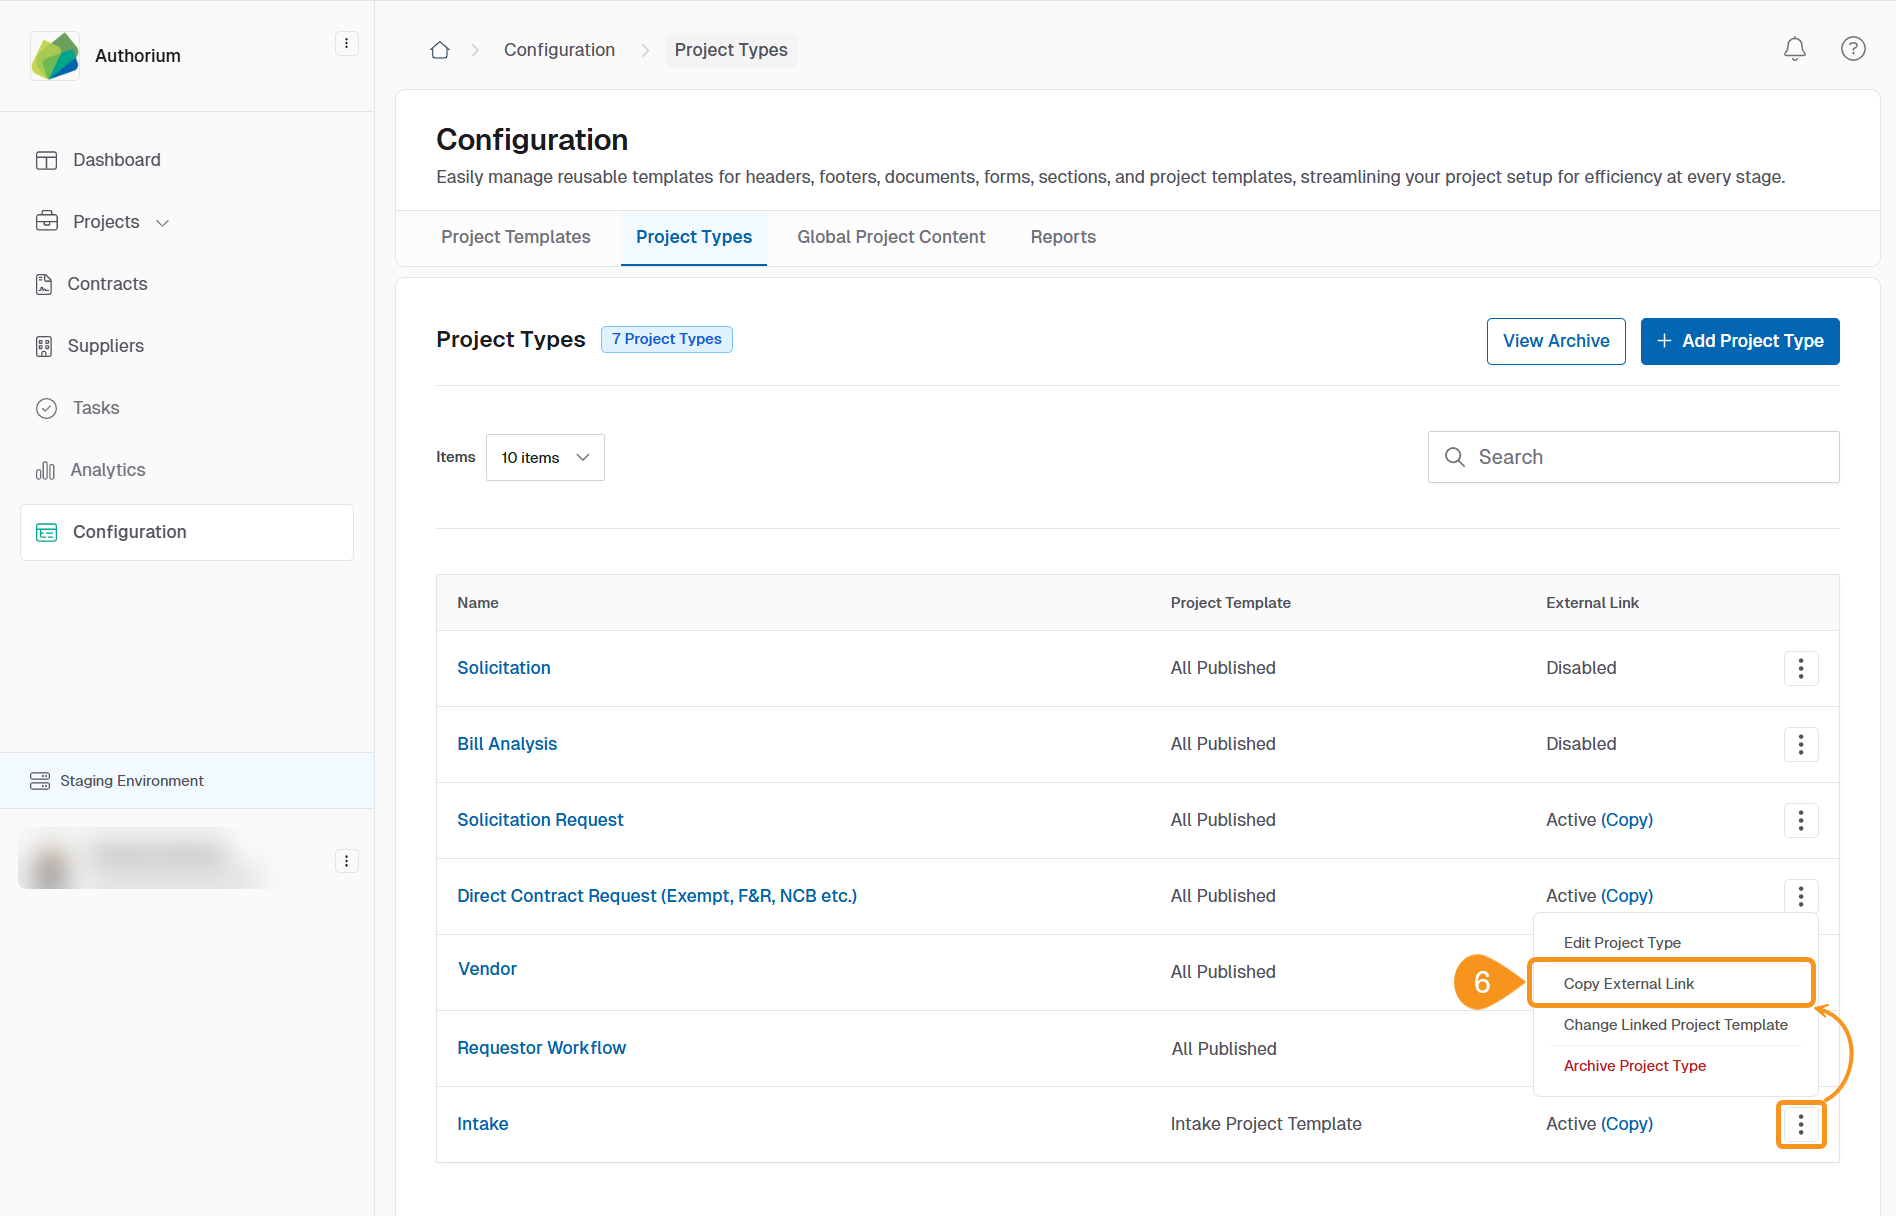
This unique link can be embedded in platforms such as SharePoint, ServiceNow, or any internal documentation space.
Step-by-Step Process for External Users
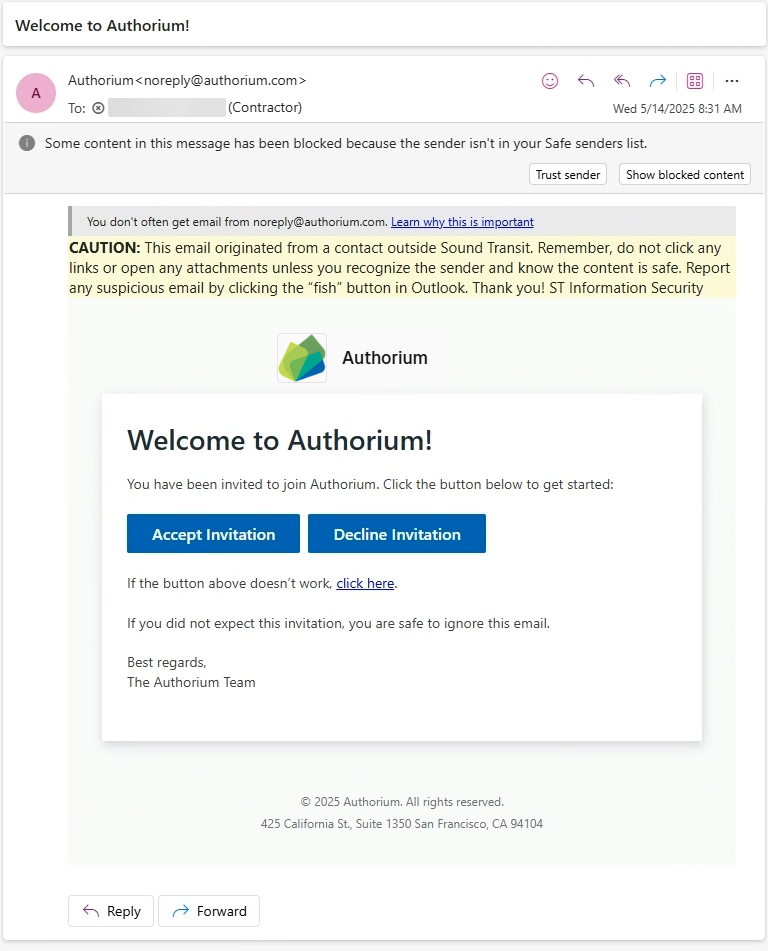
- Access the Link provided by the company. The Welcome to Authorium page will open.
- Enter your Email Address.
- Click Send Confirmation Link.
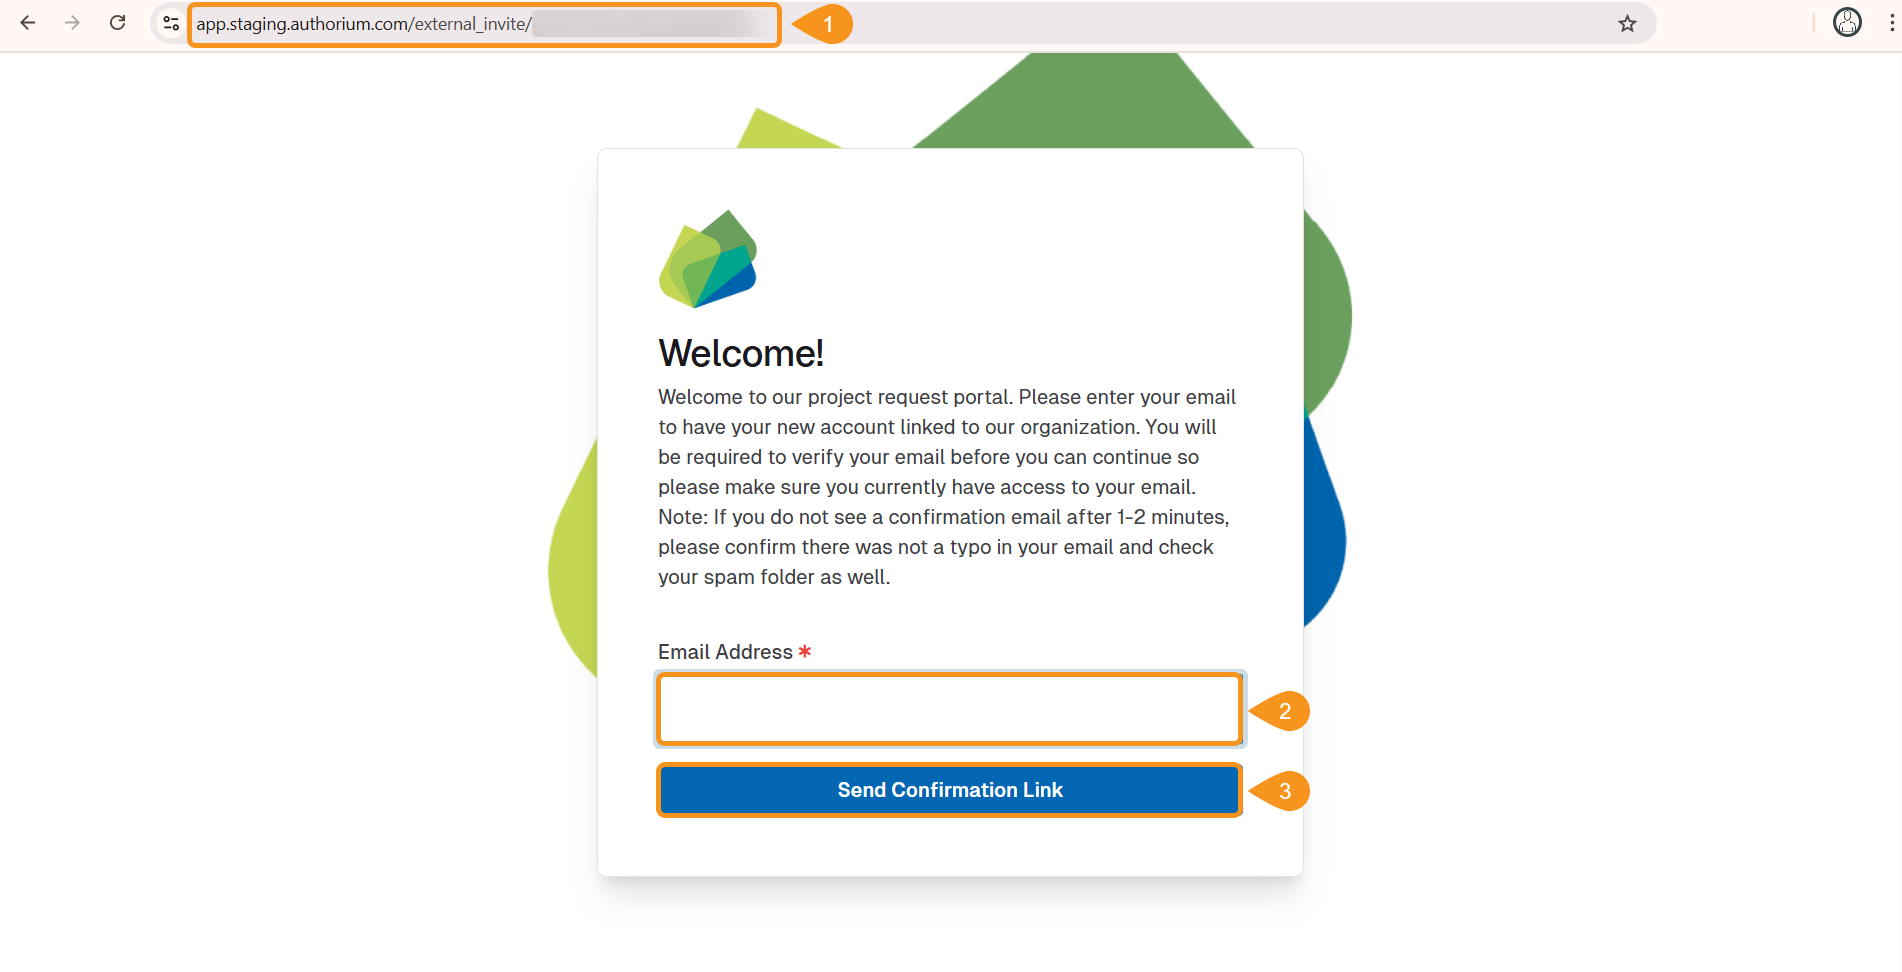
Authorium checks the email domain to ensure it matches the company’s since only users with an authorized domain are allowed to proceed. Once you are allowed, the system will send you an email invitation.
After accepting the invitation:
- If you do not have an Authorium account, you will be prompted to create one. After creating the account, you will be directed to the corresponding section of the project.
- If you already have an account, you will be redirected to the corresponding section of the specified project template.
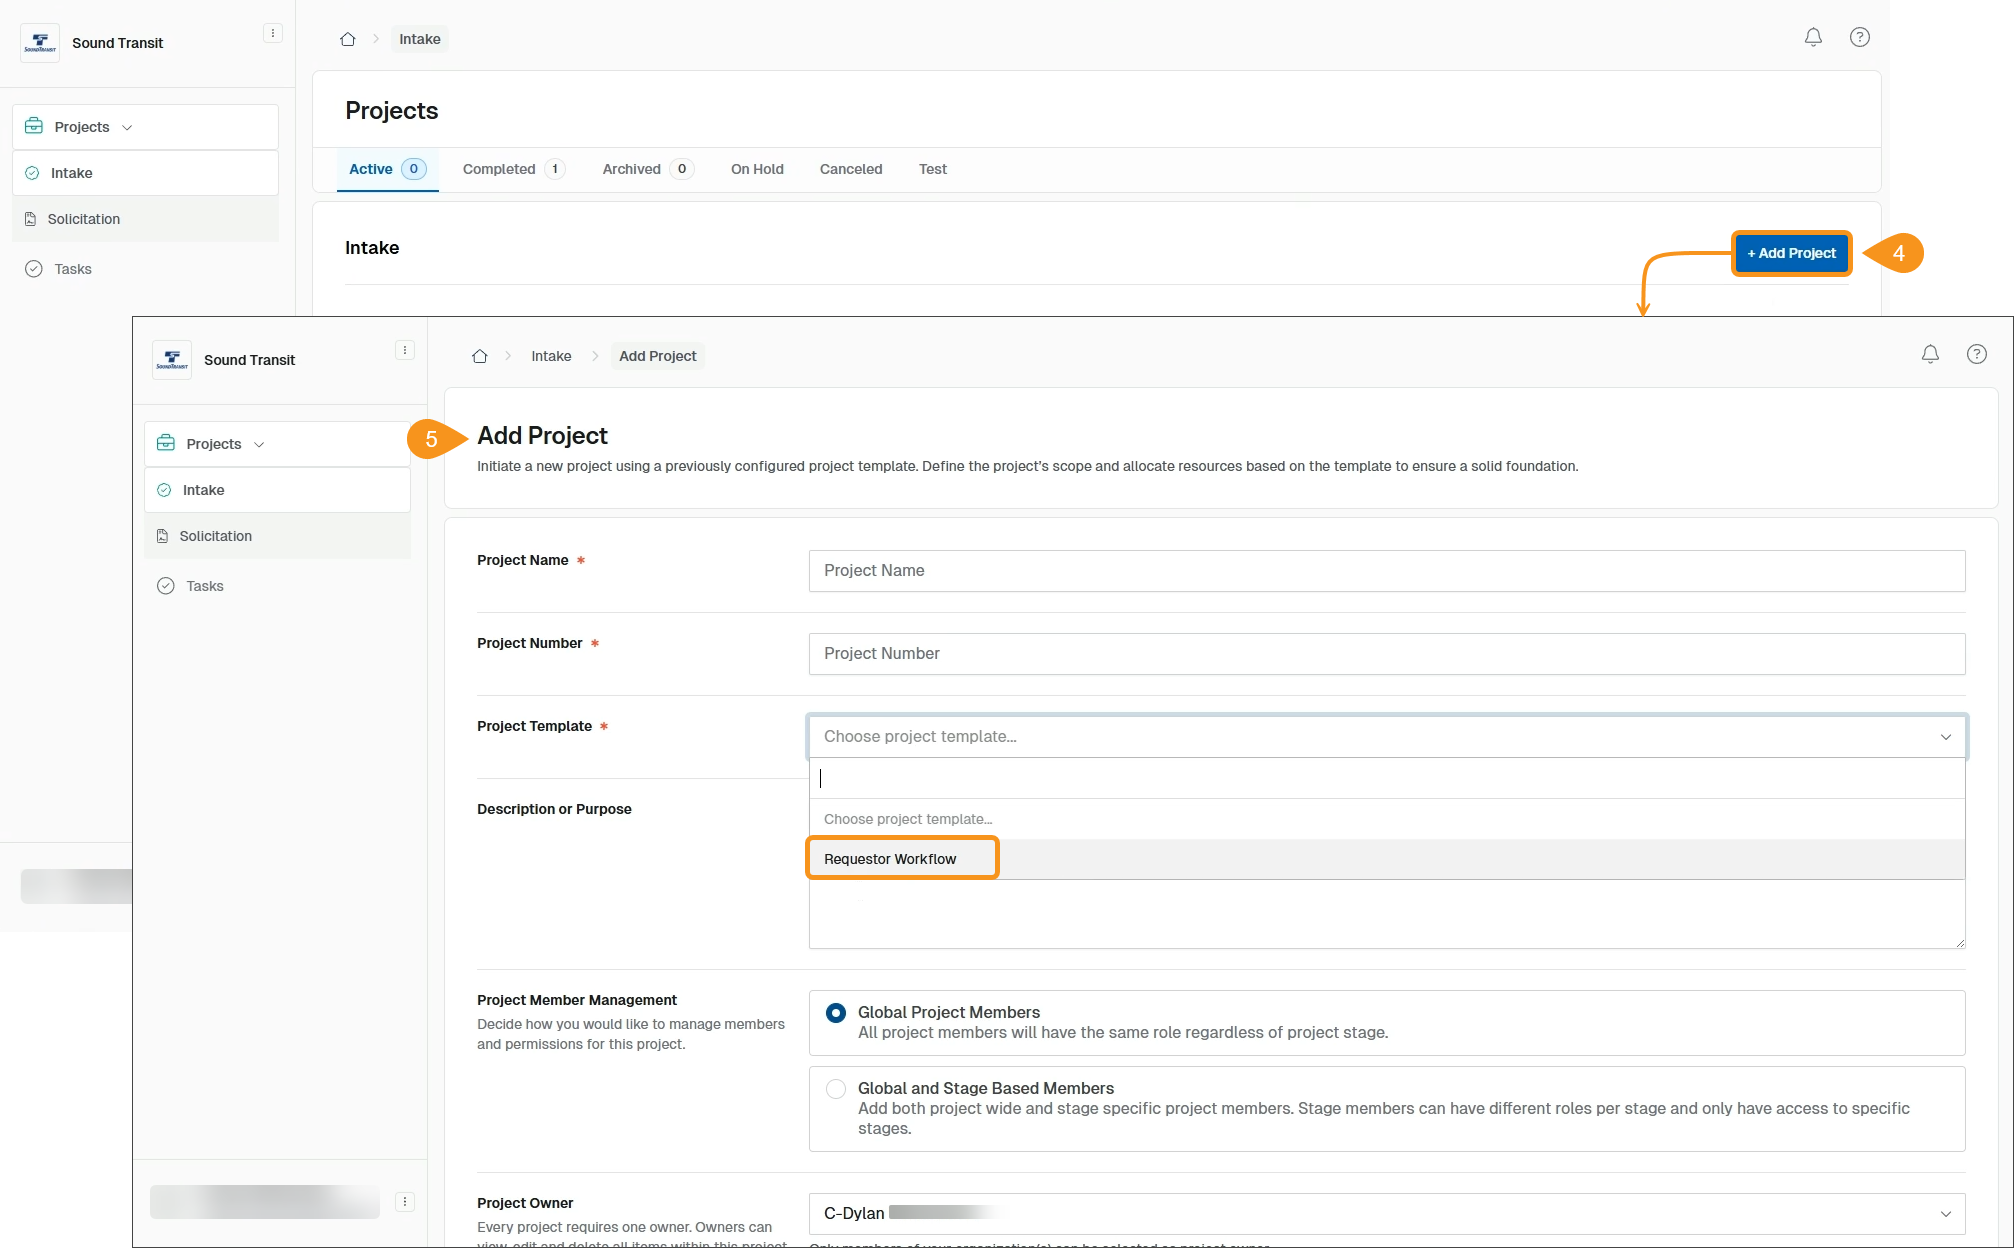
- Once logged in, select Add a Project. The Add Project window will open.
- After initiating the project, you can:
- Fill in project information,
- Add collaborators or internal team members in the project tab,
- Trigger any stage-based handovers as defined in your internal process (e.g., for design or engineering stages).
The only template available to you will be the one pre-configured via the shared link.
-
This setup is not integrated with requestor queues, dashboards, or tracking systems.
-
It is meant for quick project kickoff via a direct link and ensures that users land on the correct project template every time.
-
The email domain restriction ensures that only authorized external partners can access this entry point.