Use Custom Variables in a Document
This guide explains how to insert Custom Variables into a collaborative document template within a project template.
Custom Variables let you define reusable fields (like project name, client details, or deadlines) that can automatically populate multiple parts of your document, ensuring consistency and reducing manual edits.
To Use Custom Variables in a Document
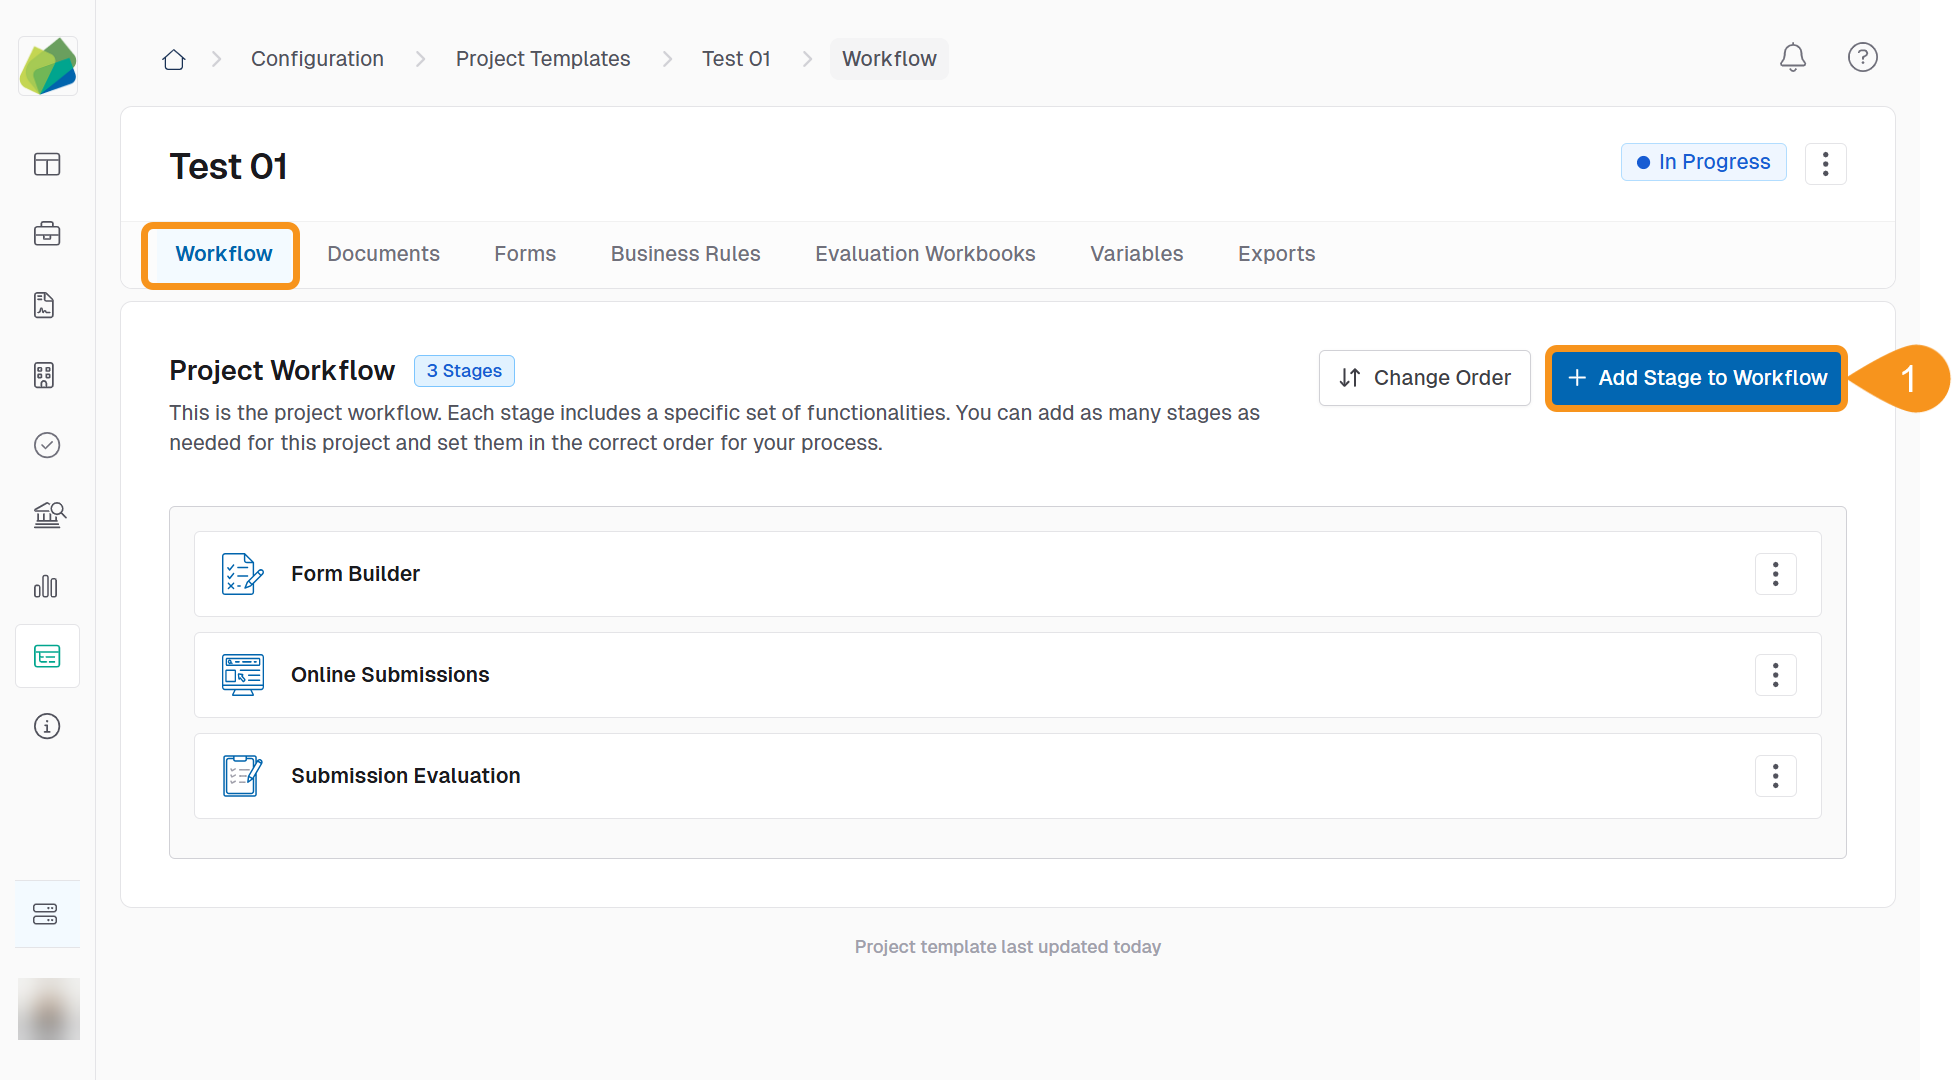
- From the Project Template Workflow screen, click Add Stage to Workflow.
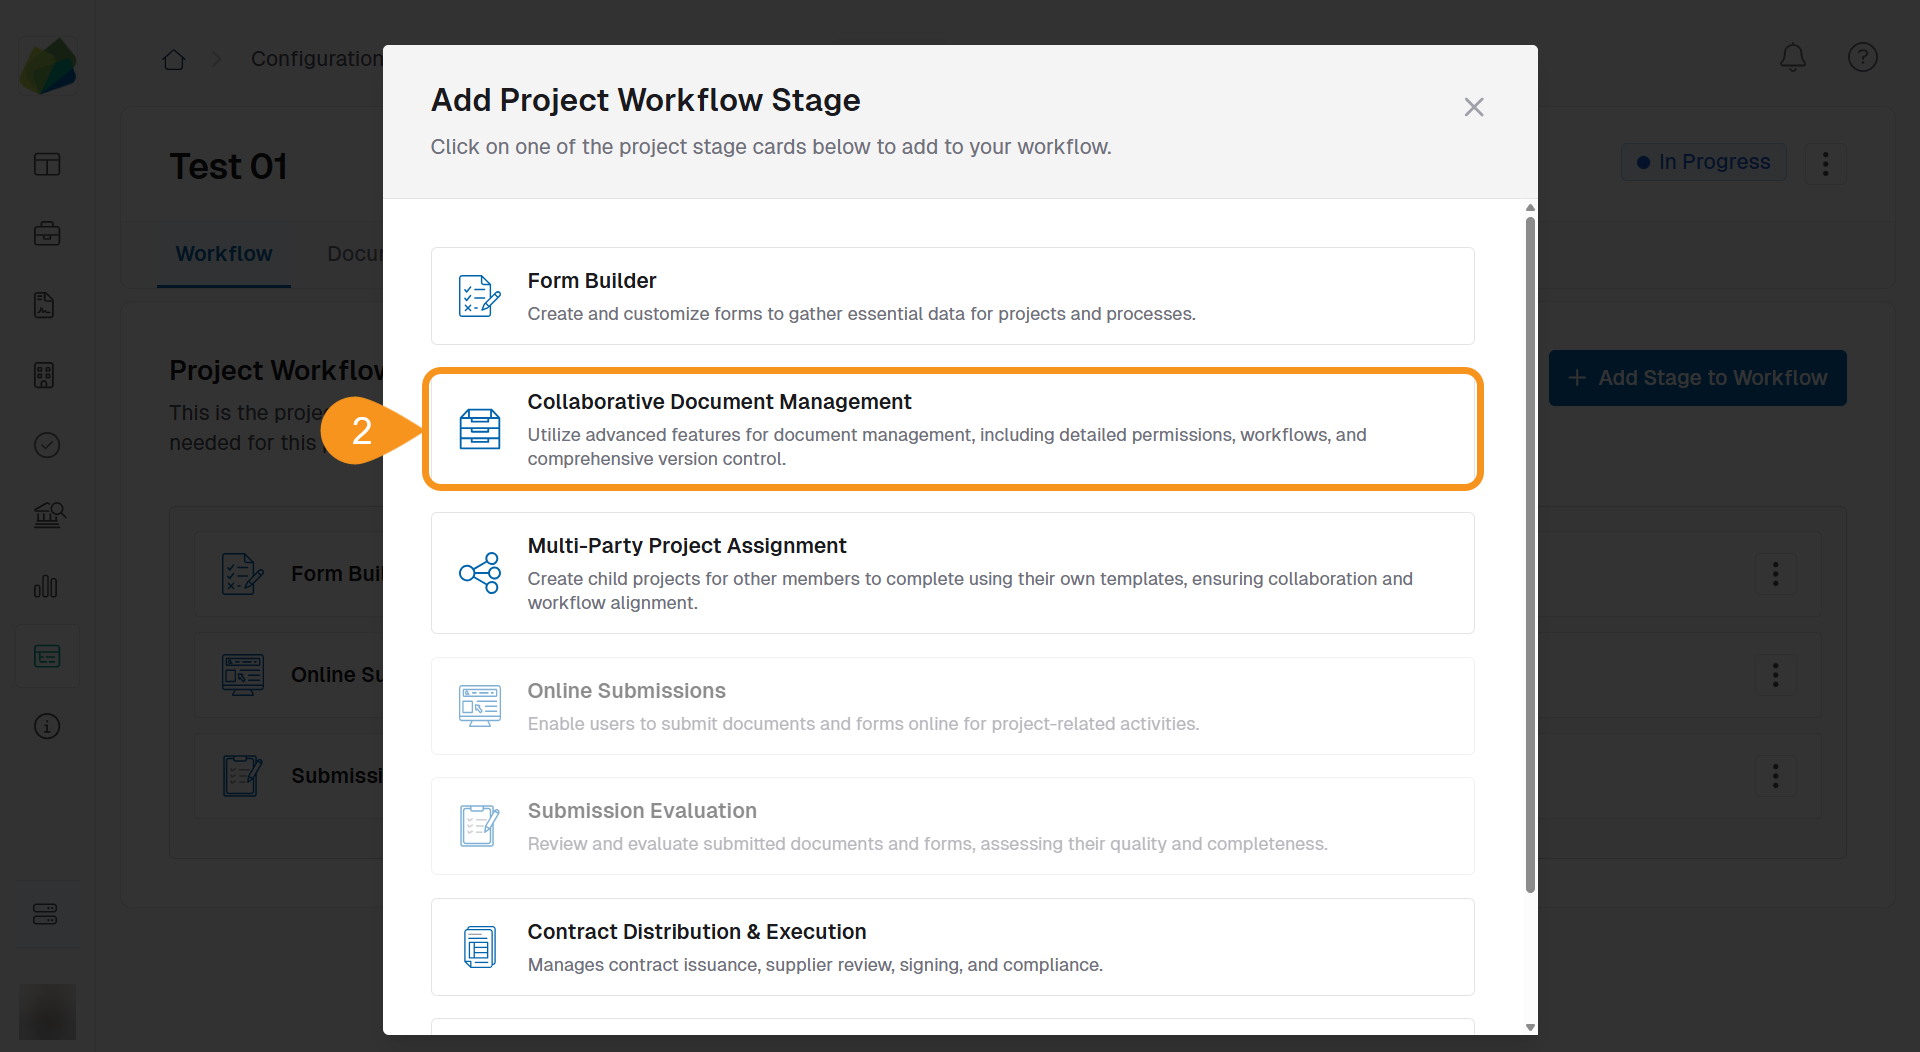
- Select Collaborative Document Management.
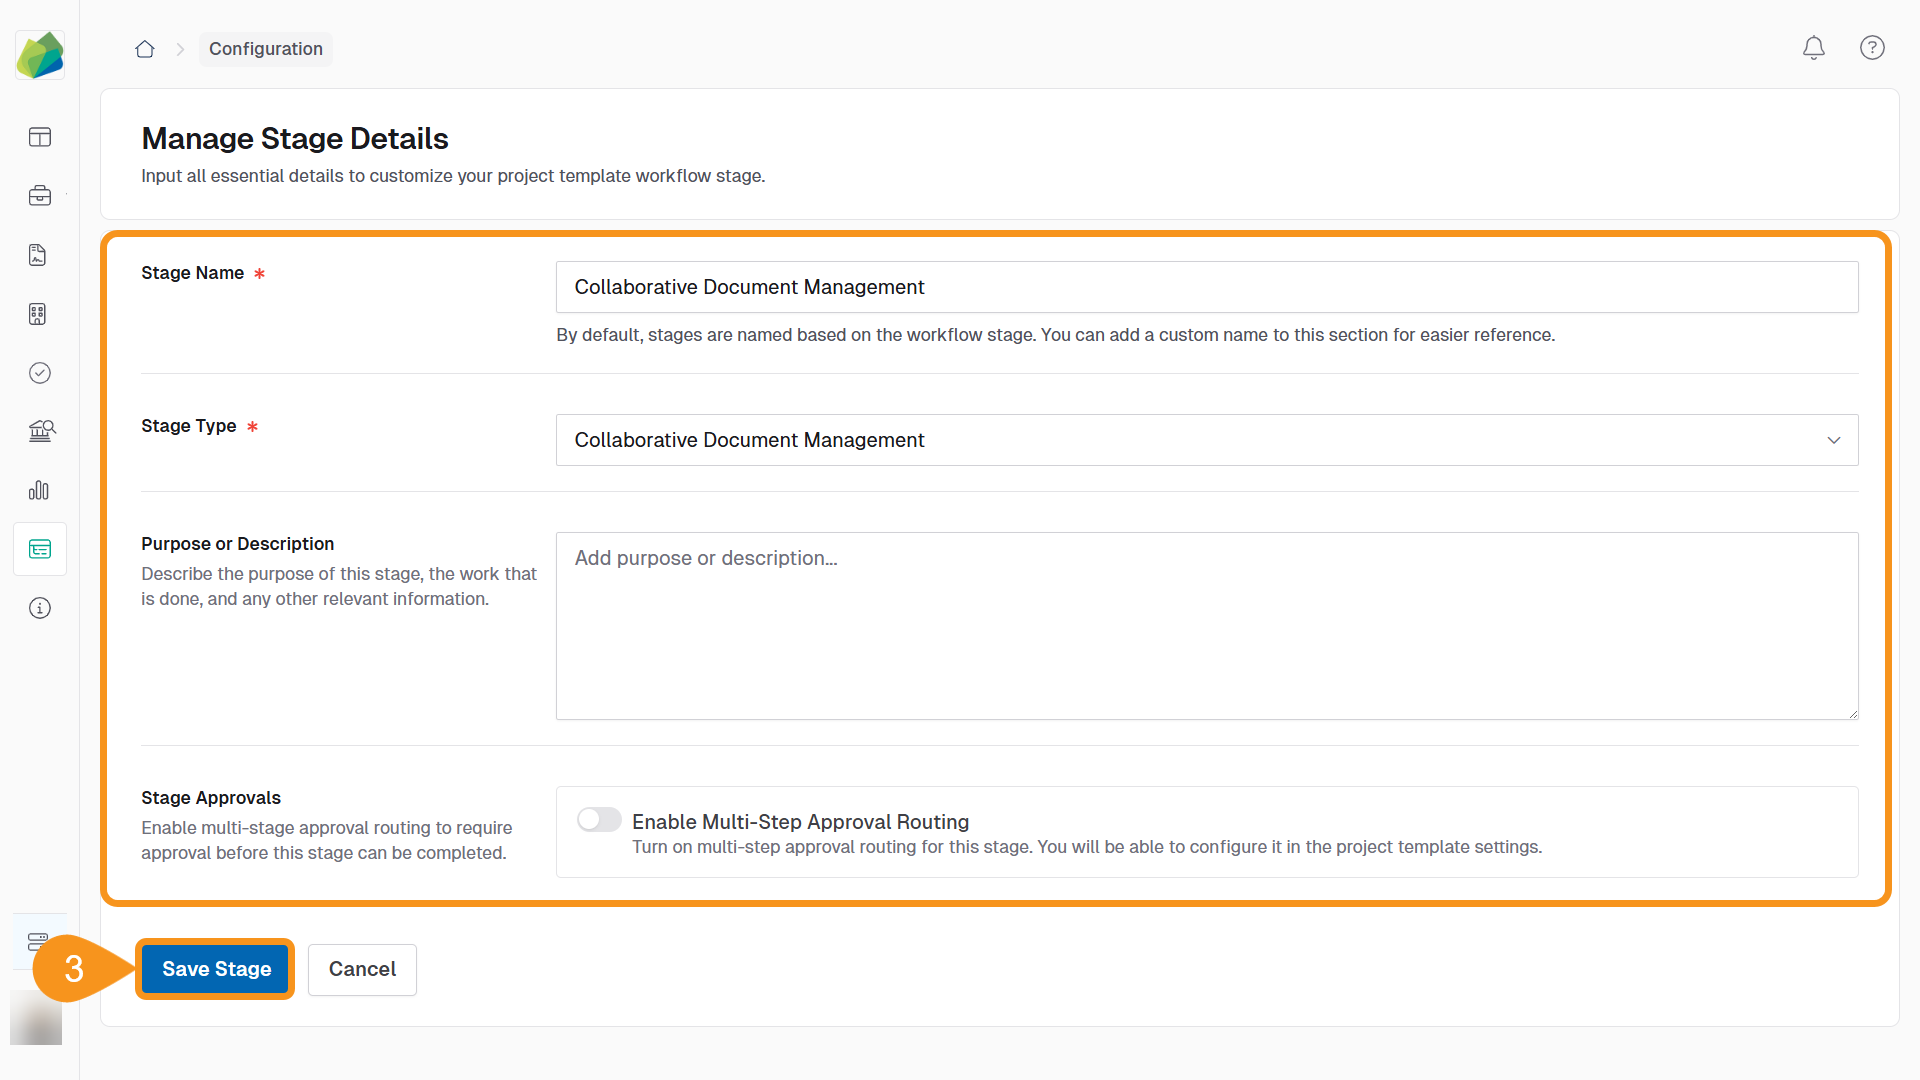
- Fill in the stage details (for example, stage name and type), then click Save Stage.
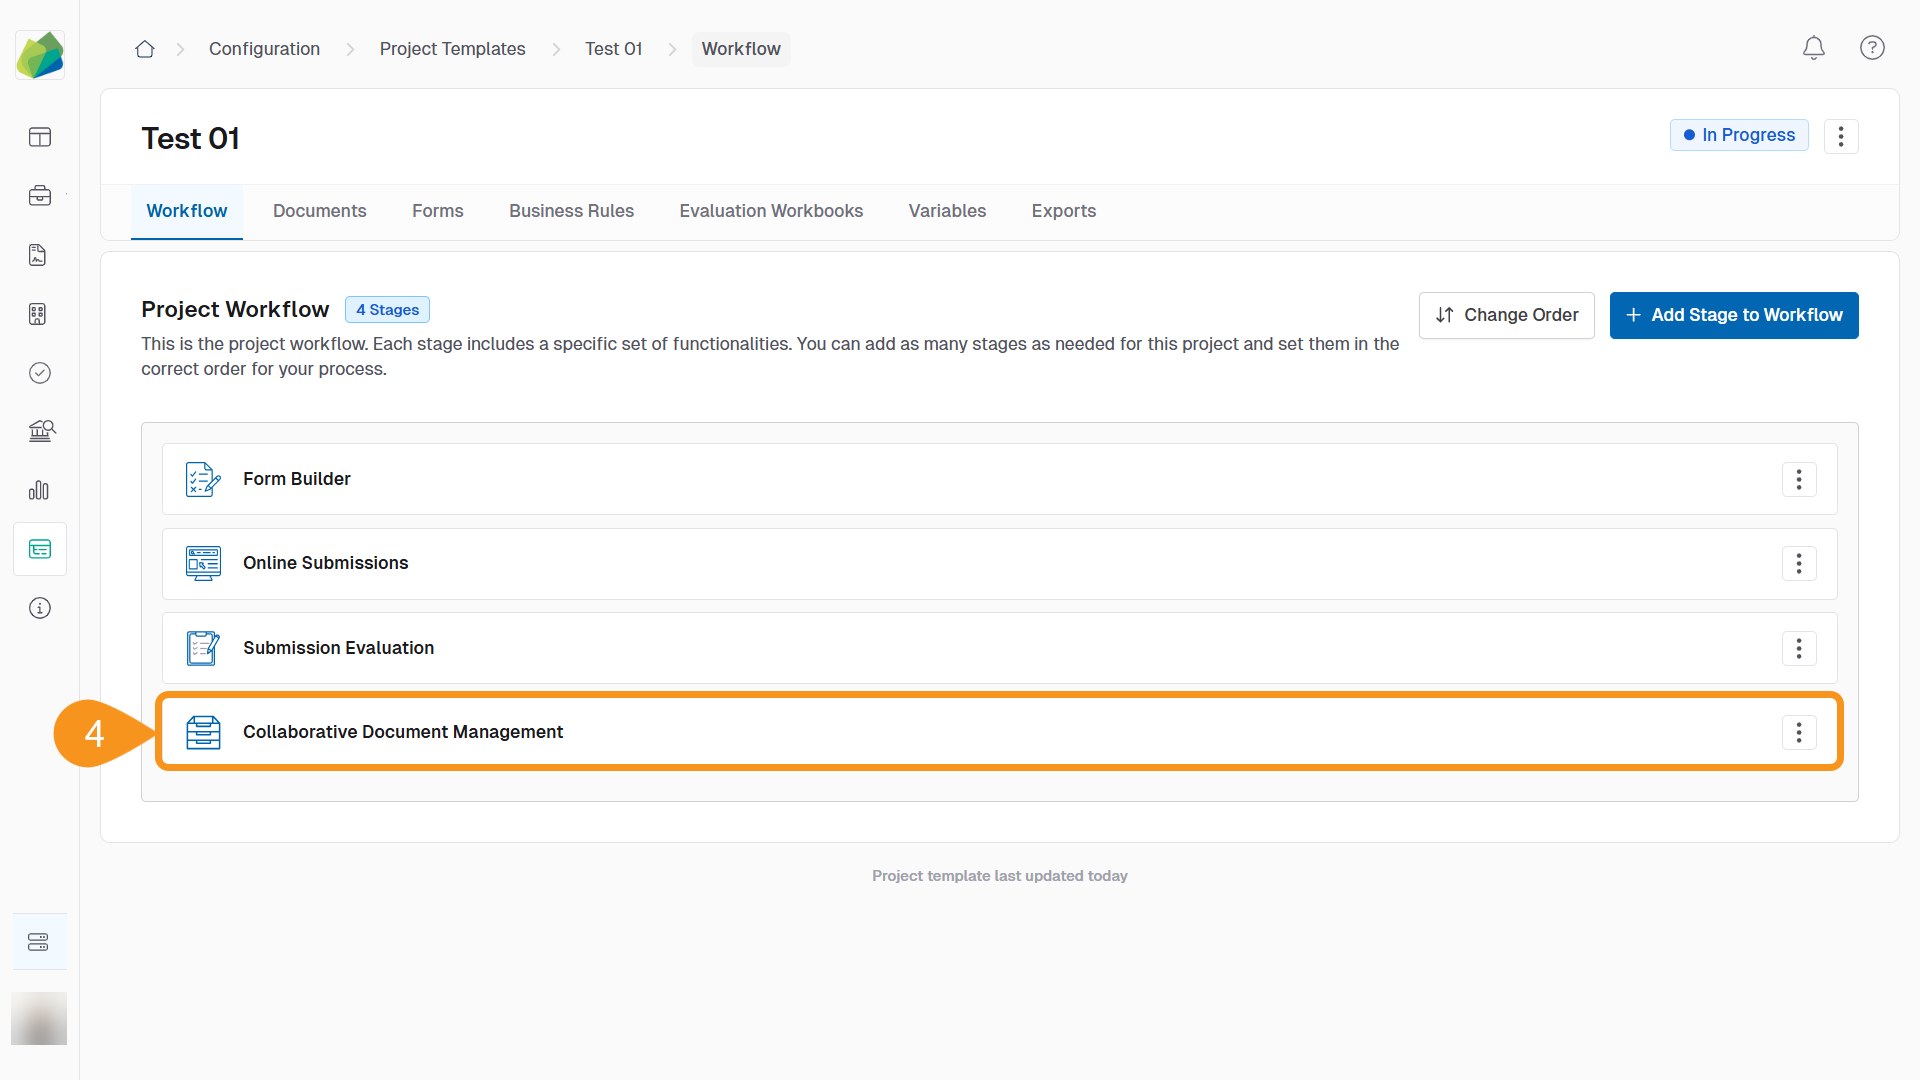
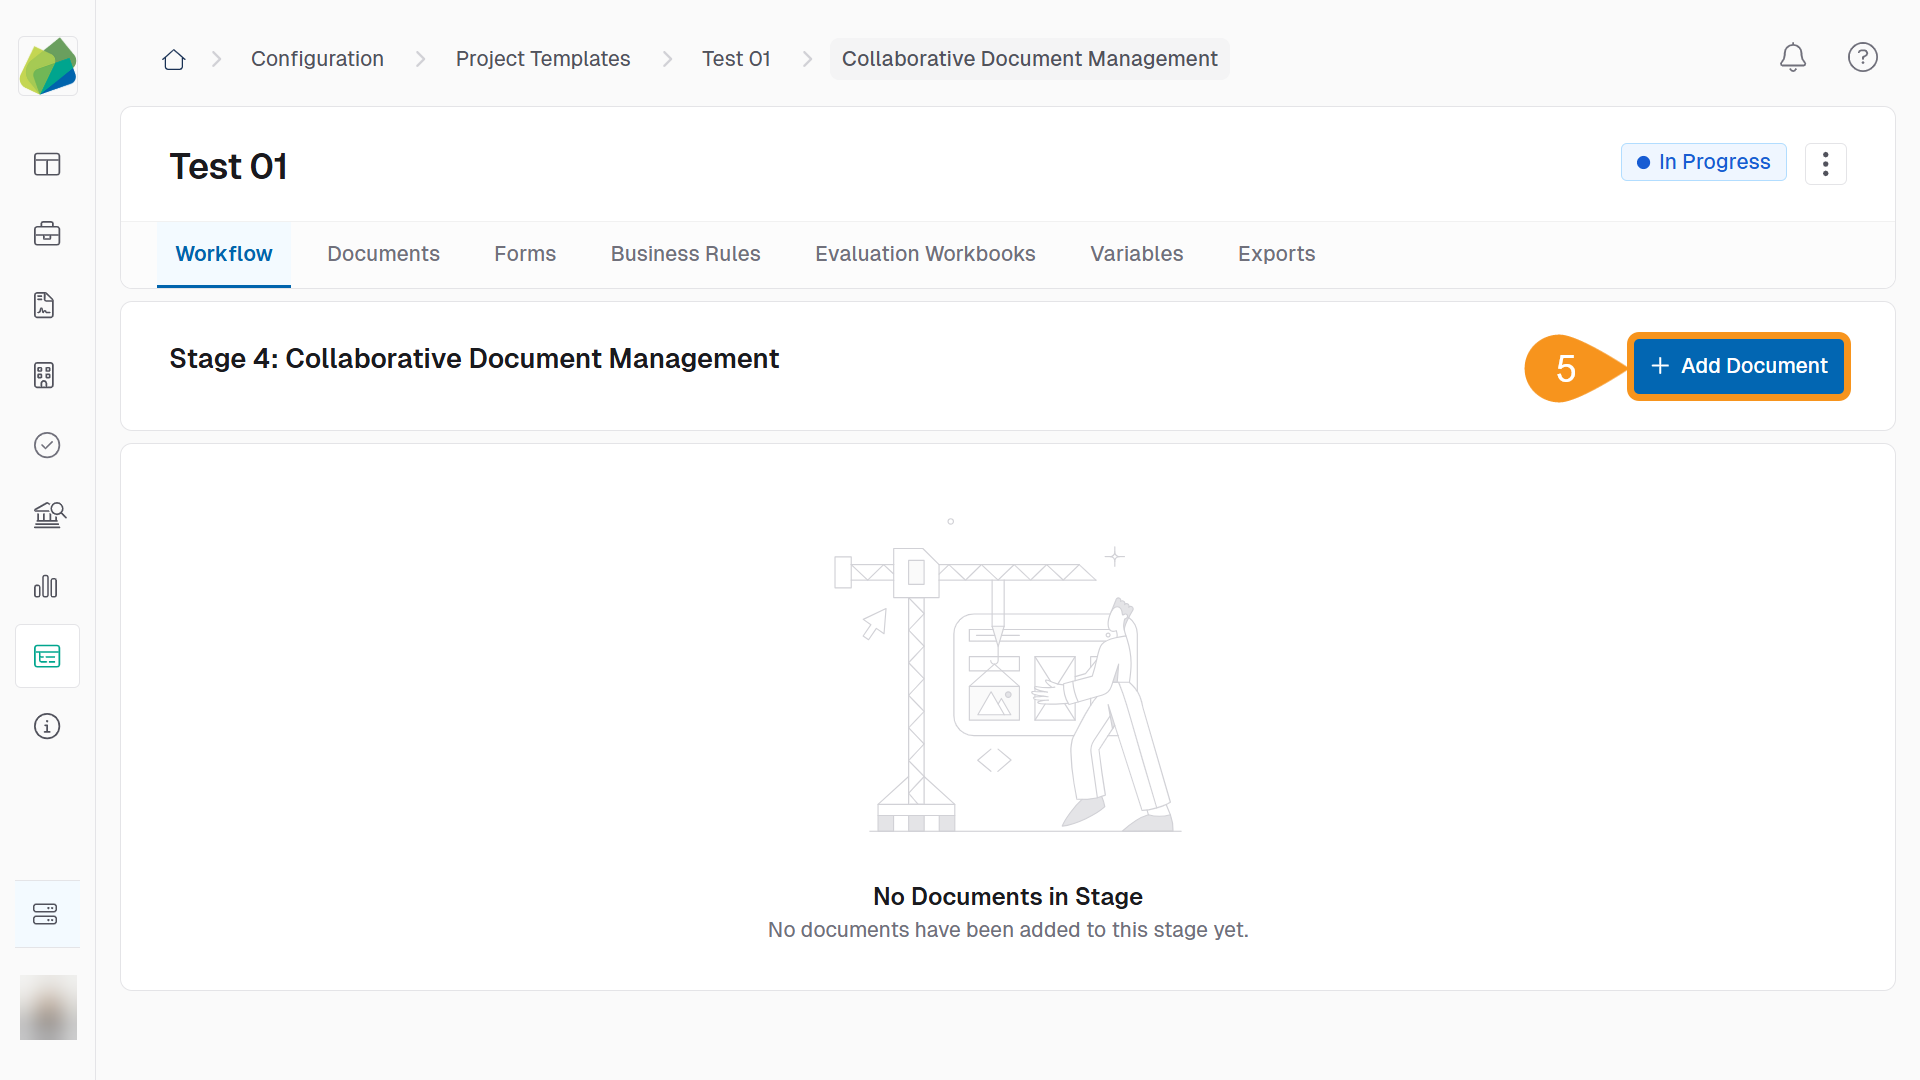
- After saving, you will return to the Project Workflow screen. Select the Collaborative Document Management stage you just added.
- Click Add Document.
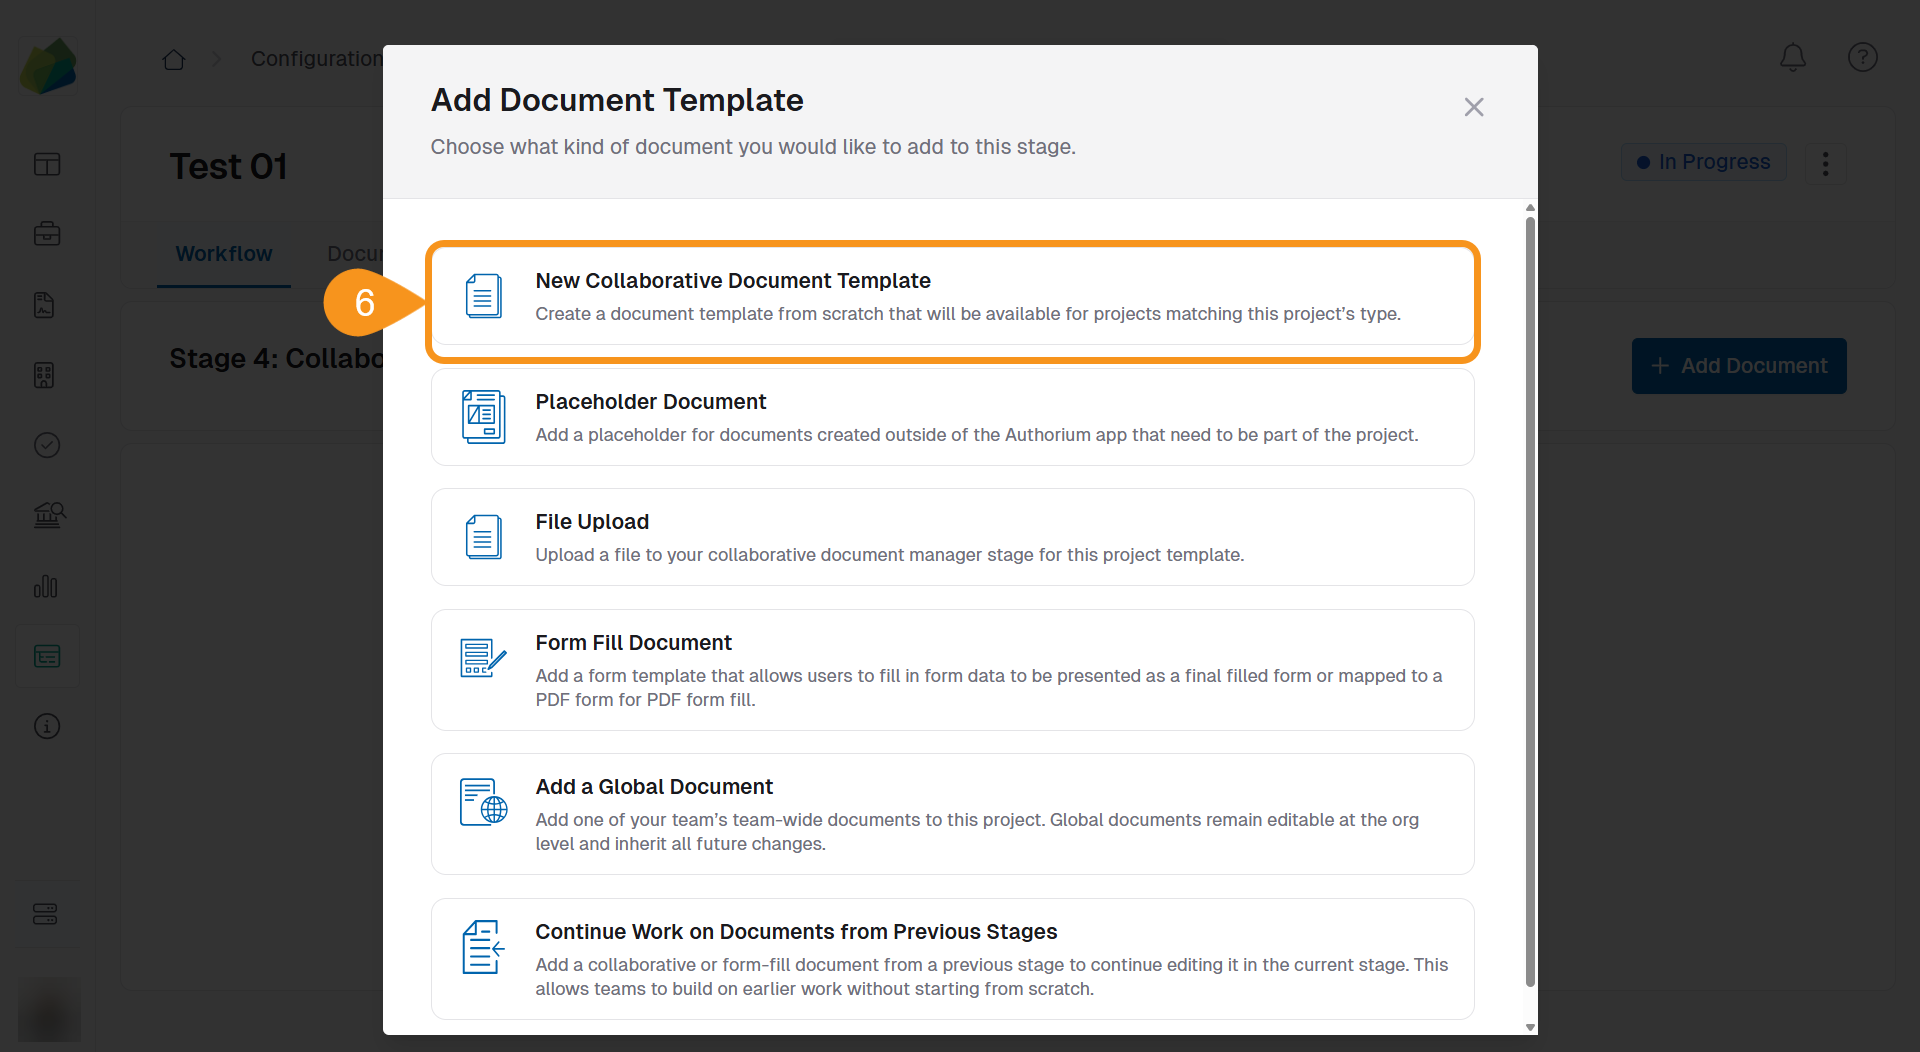
- Choose New Collaborative Document Template.
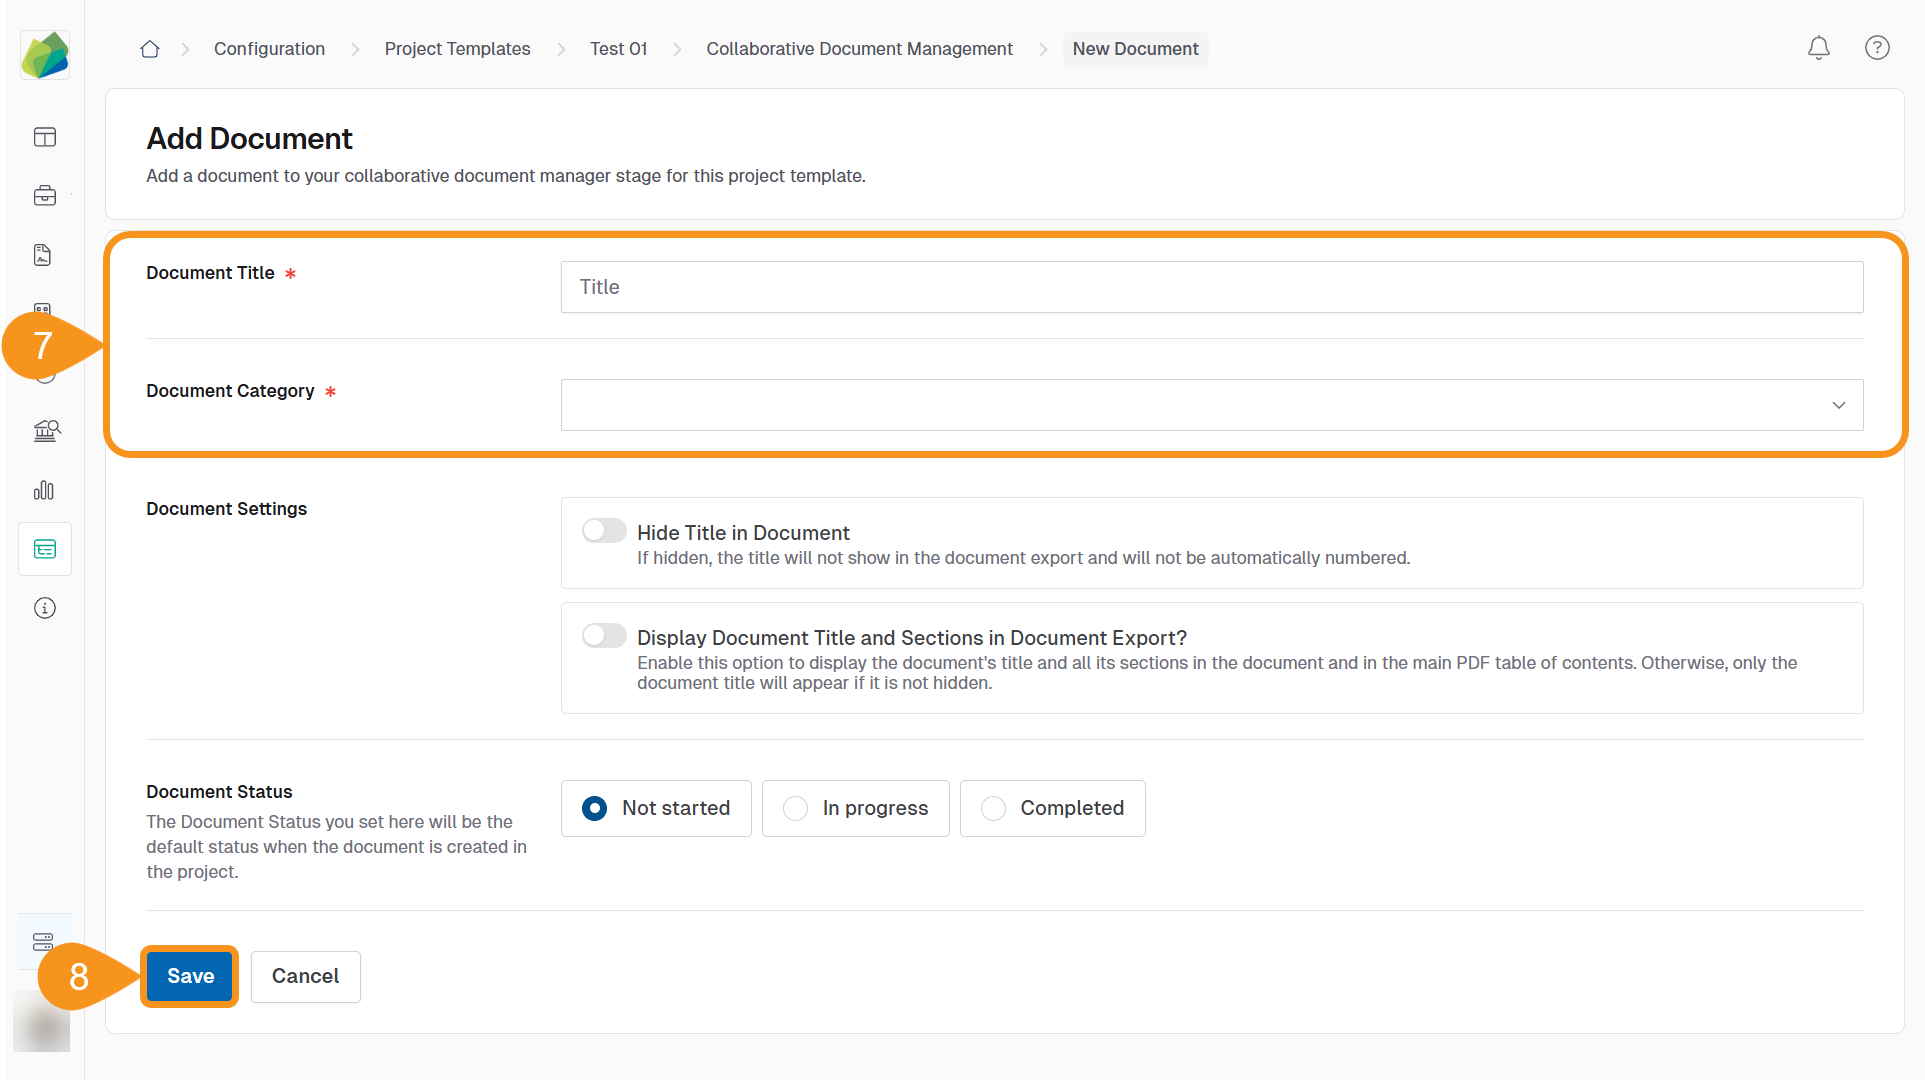
- Fill in the required fields:
- Document Title
- Document Category
- Click Save to save the document.
 Note
NoteIf you don’t save the document, it won’t appear in the stage list.
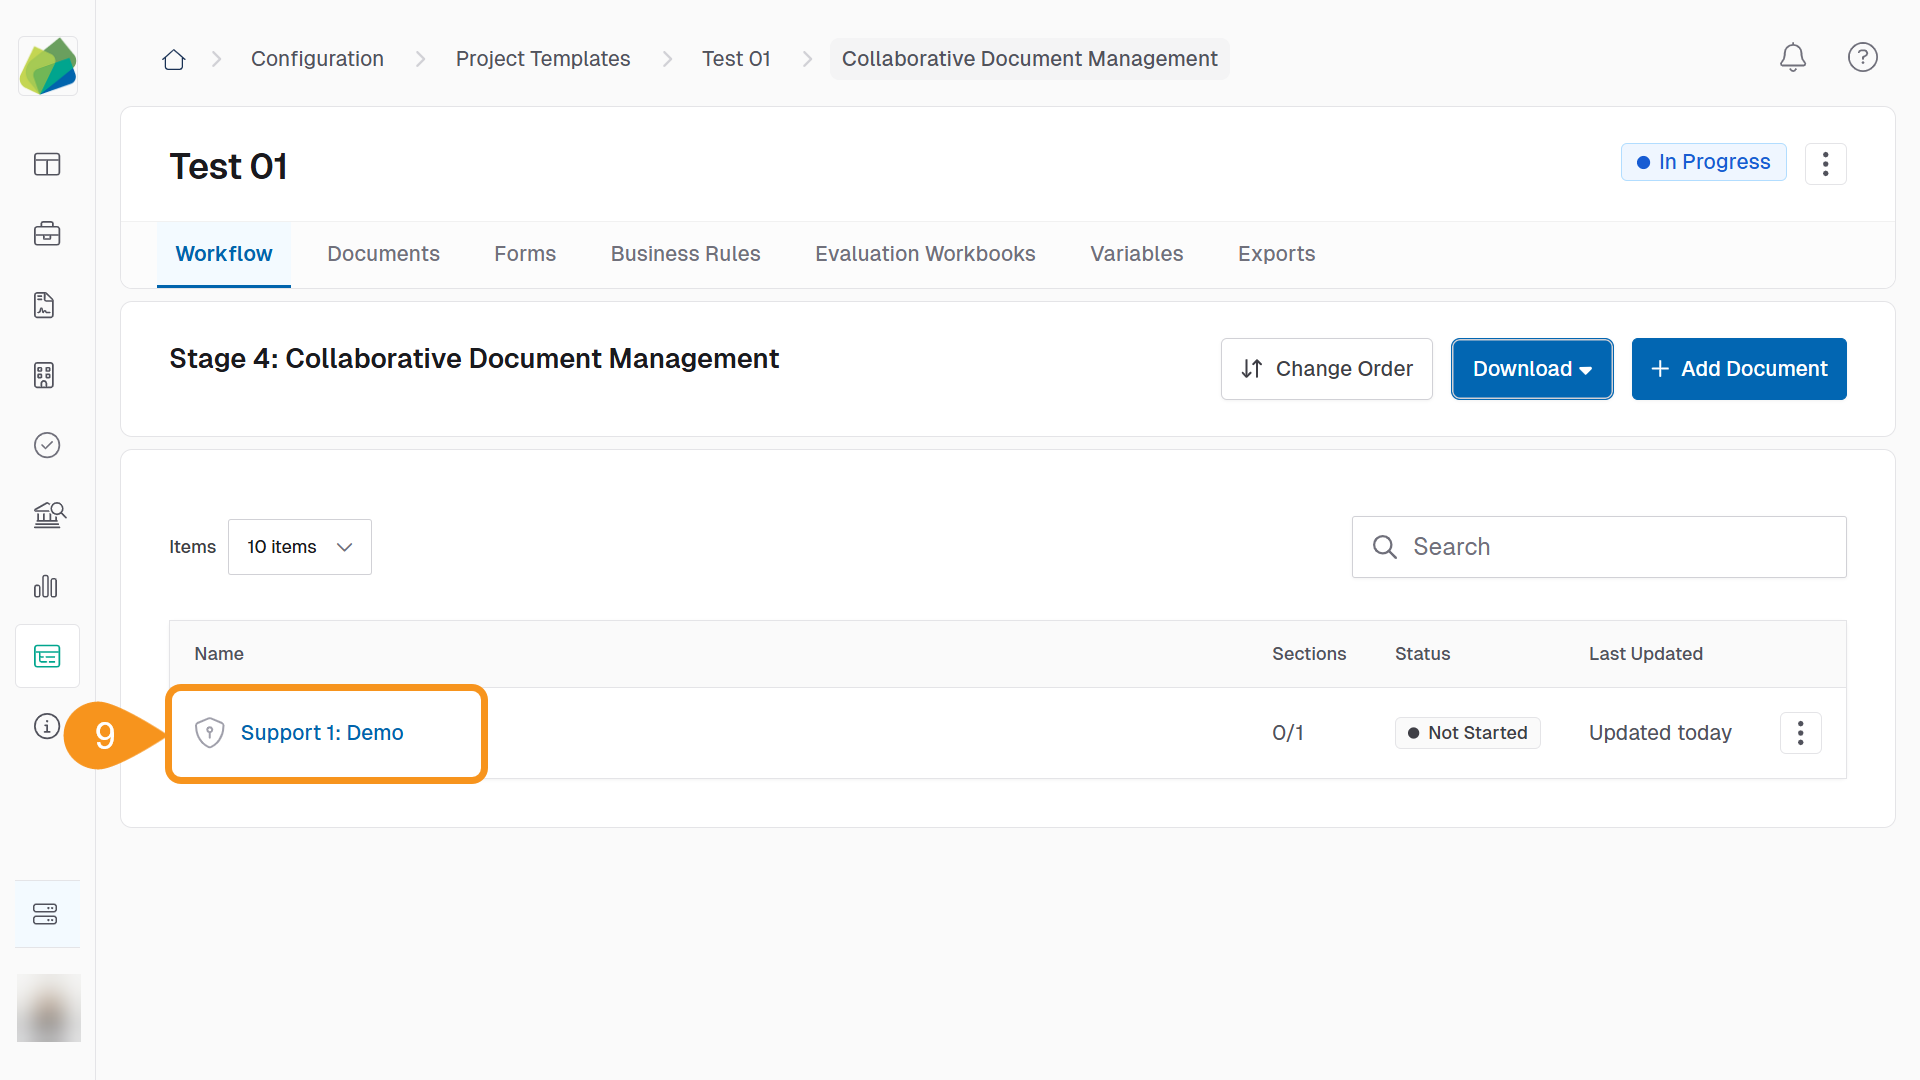
- In the stage list, find the document you created and click its name to open it in the editor.
- Insert a custom variable by either:
- Typing
{{and selecting it from the Custom Variables list, or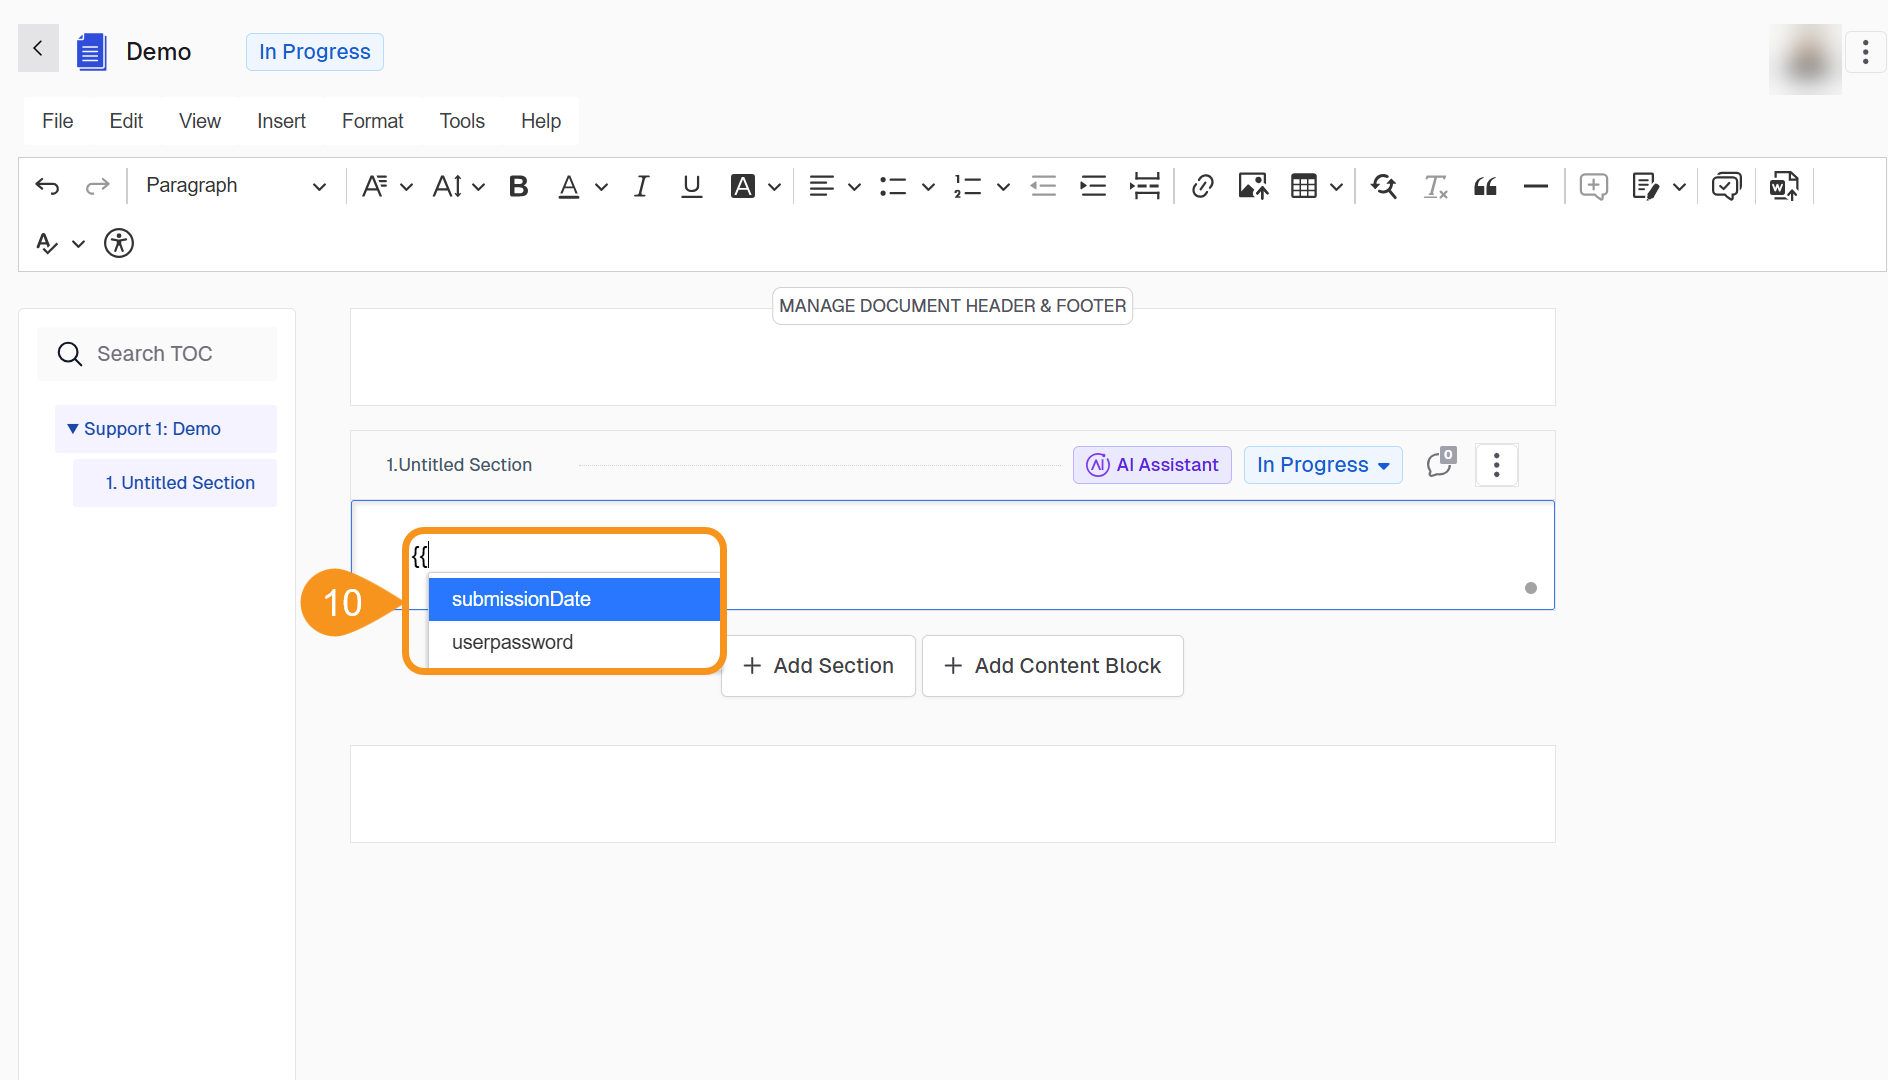
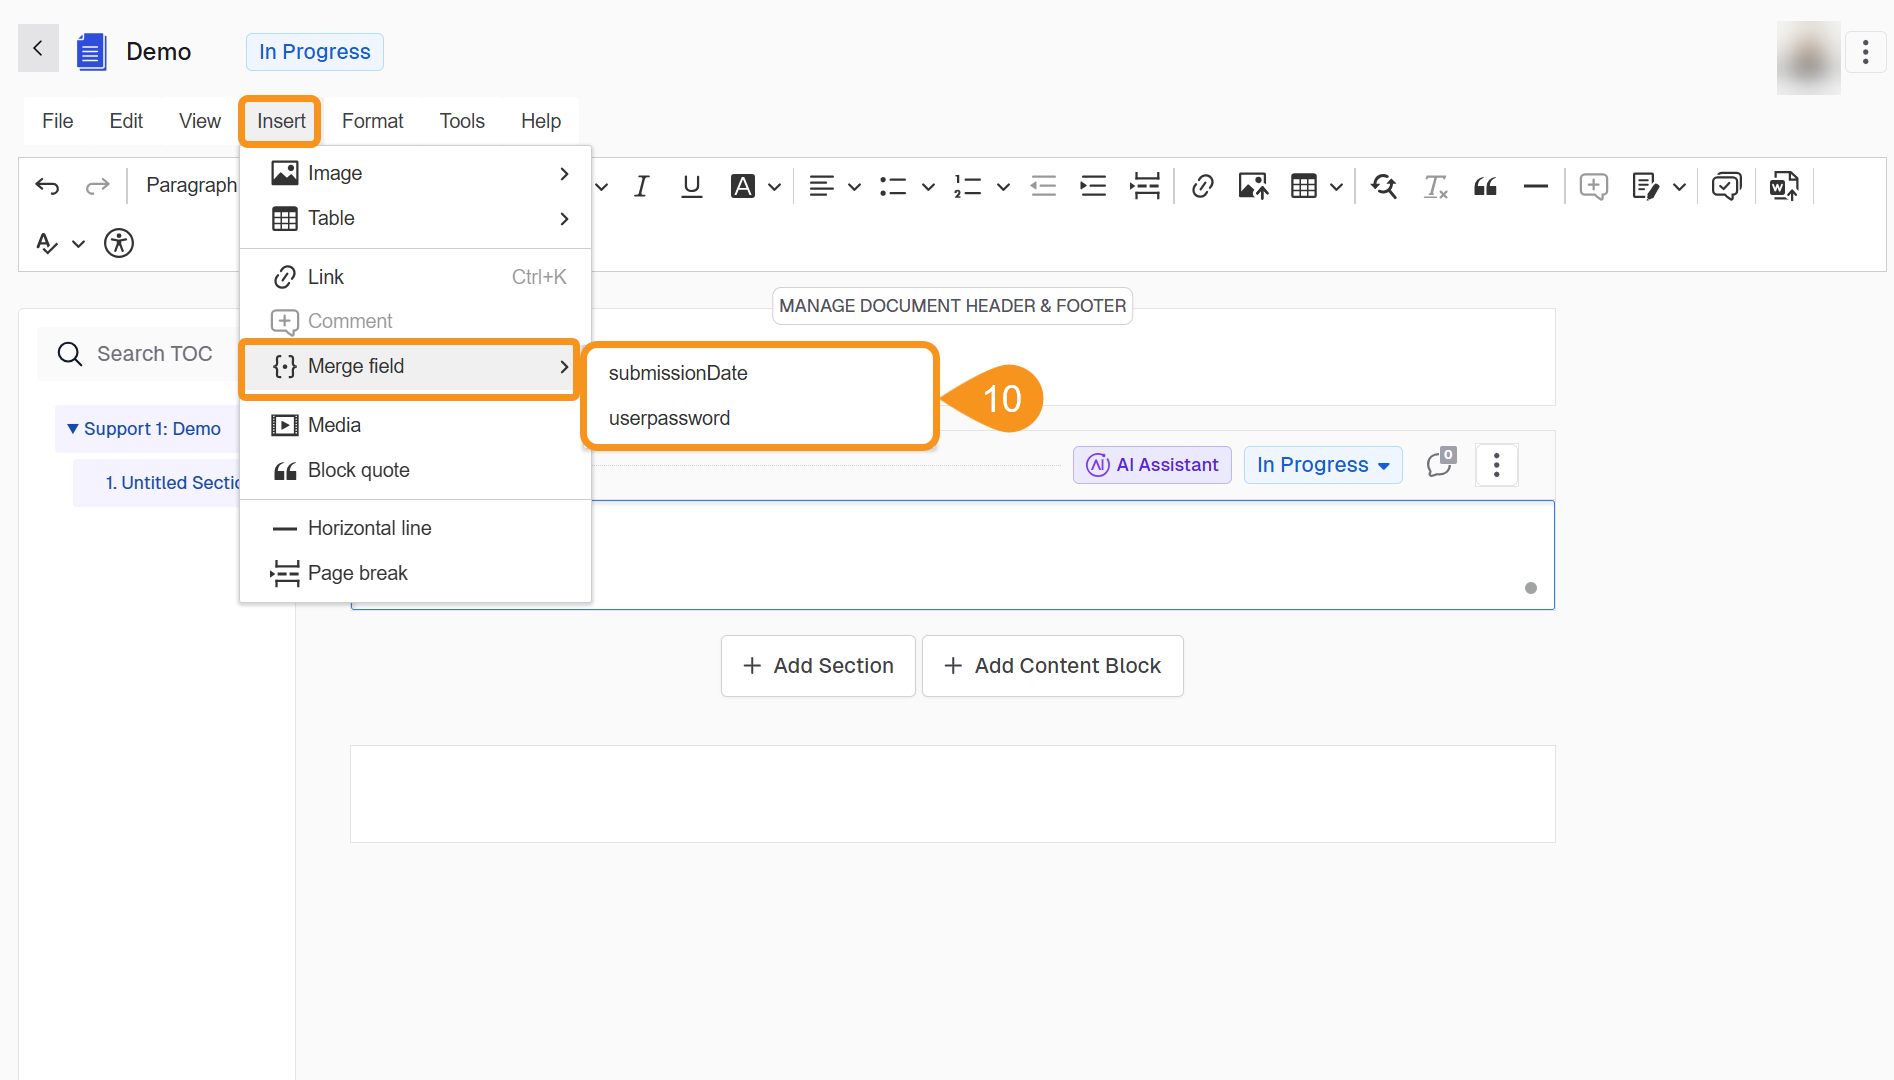
- Selecting Choose Insert > Merge field and choosing the variable.
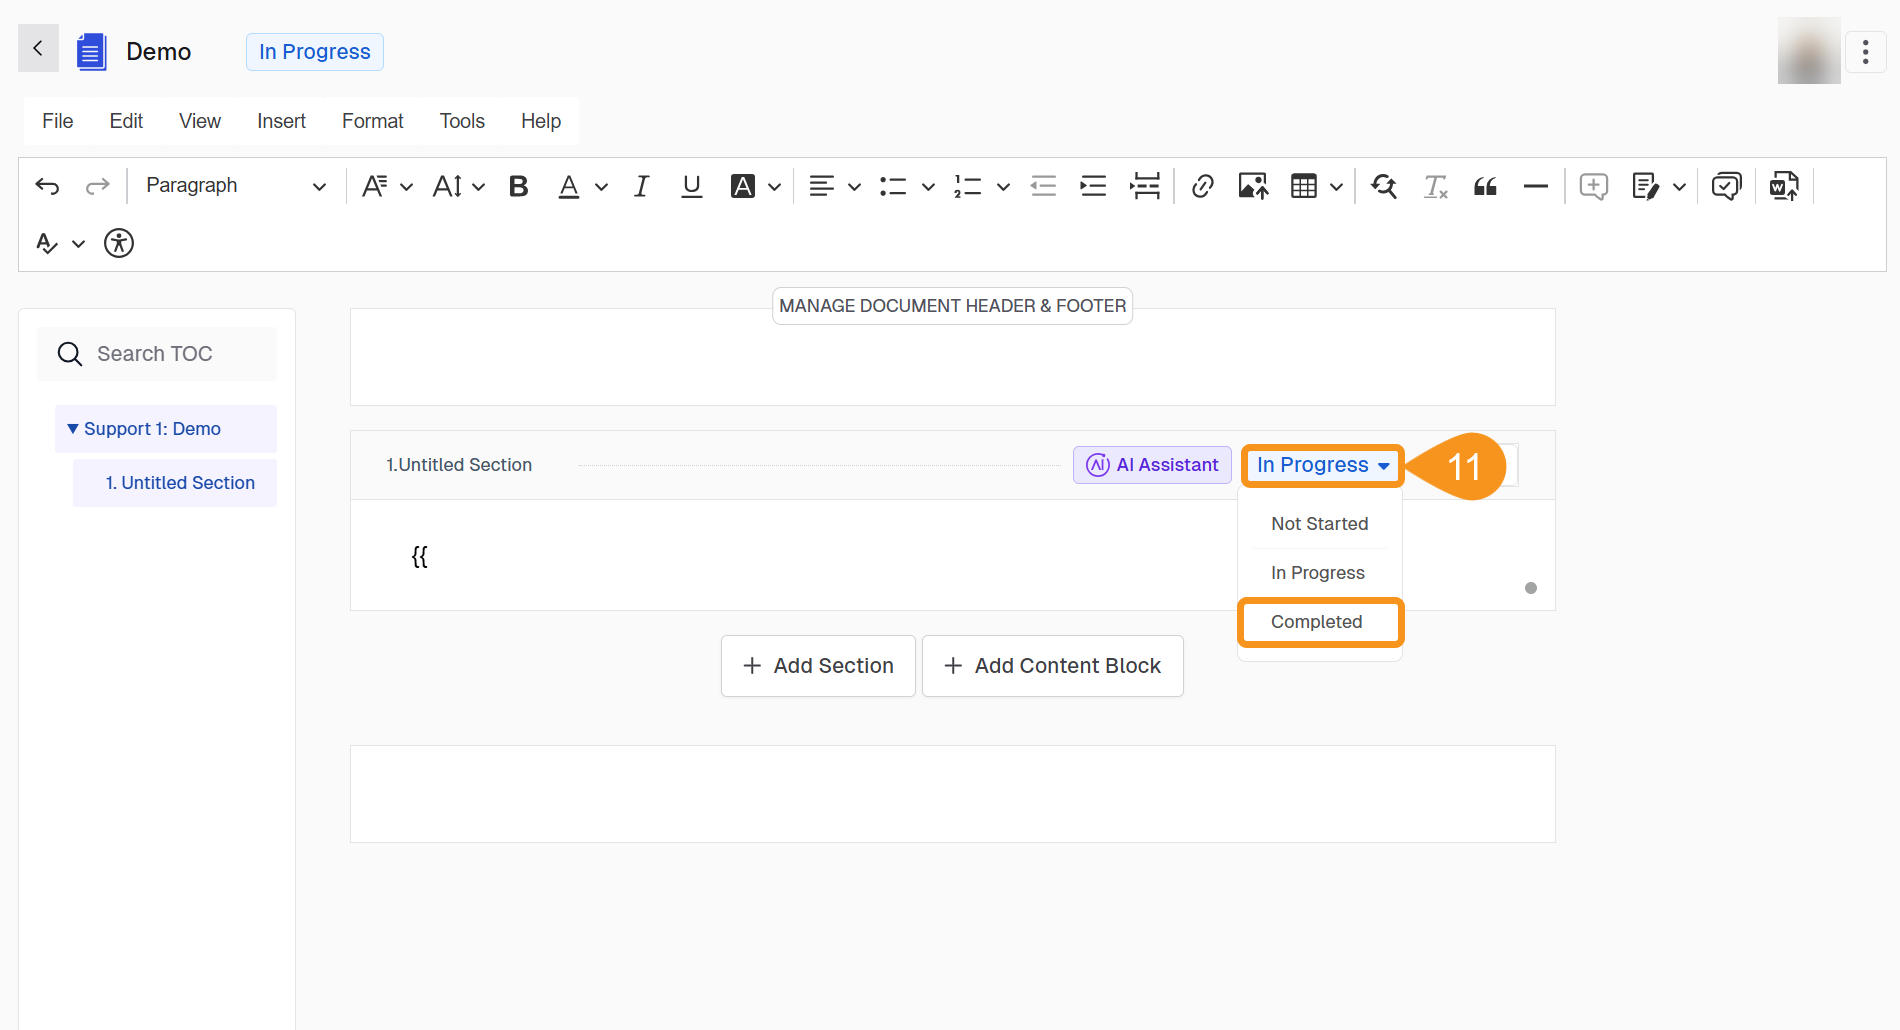
- Mark the document section as complete.
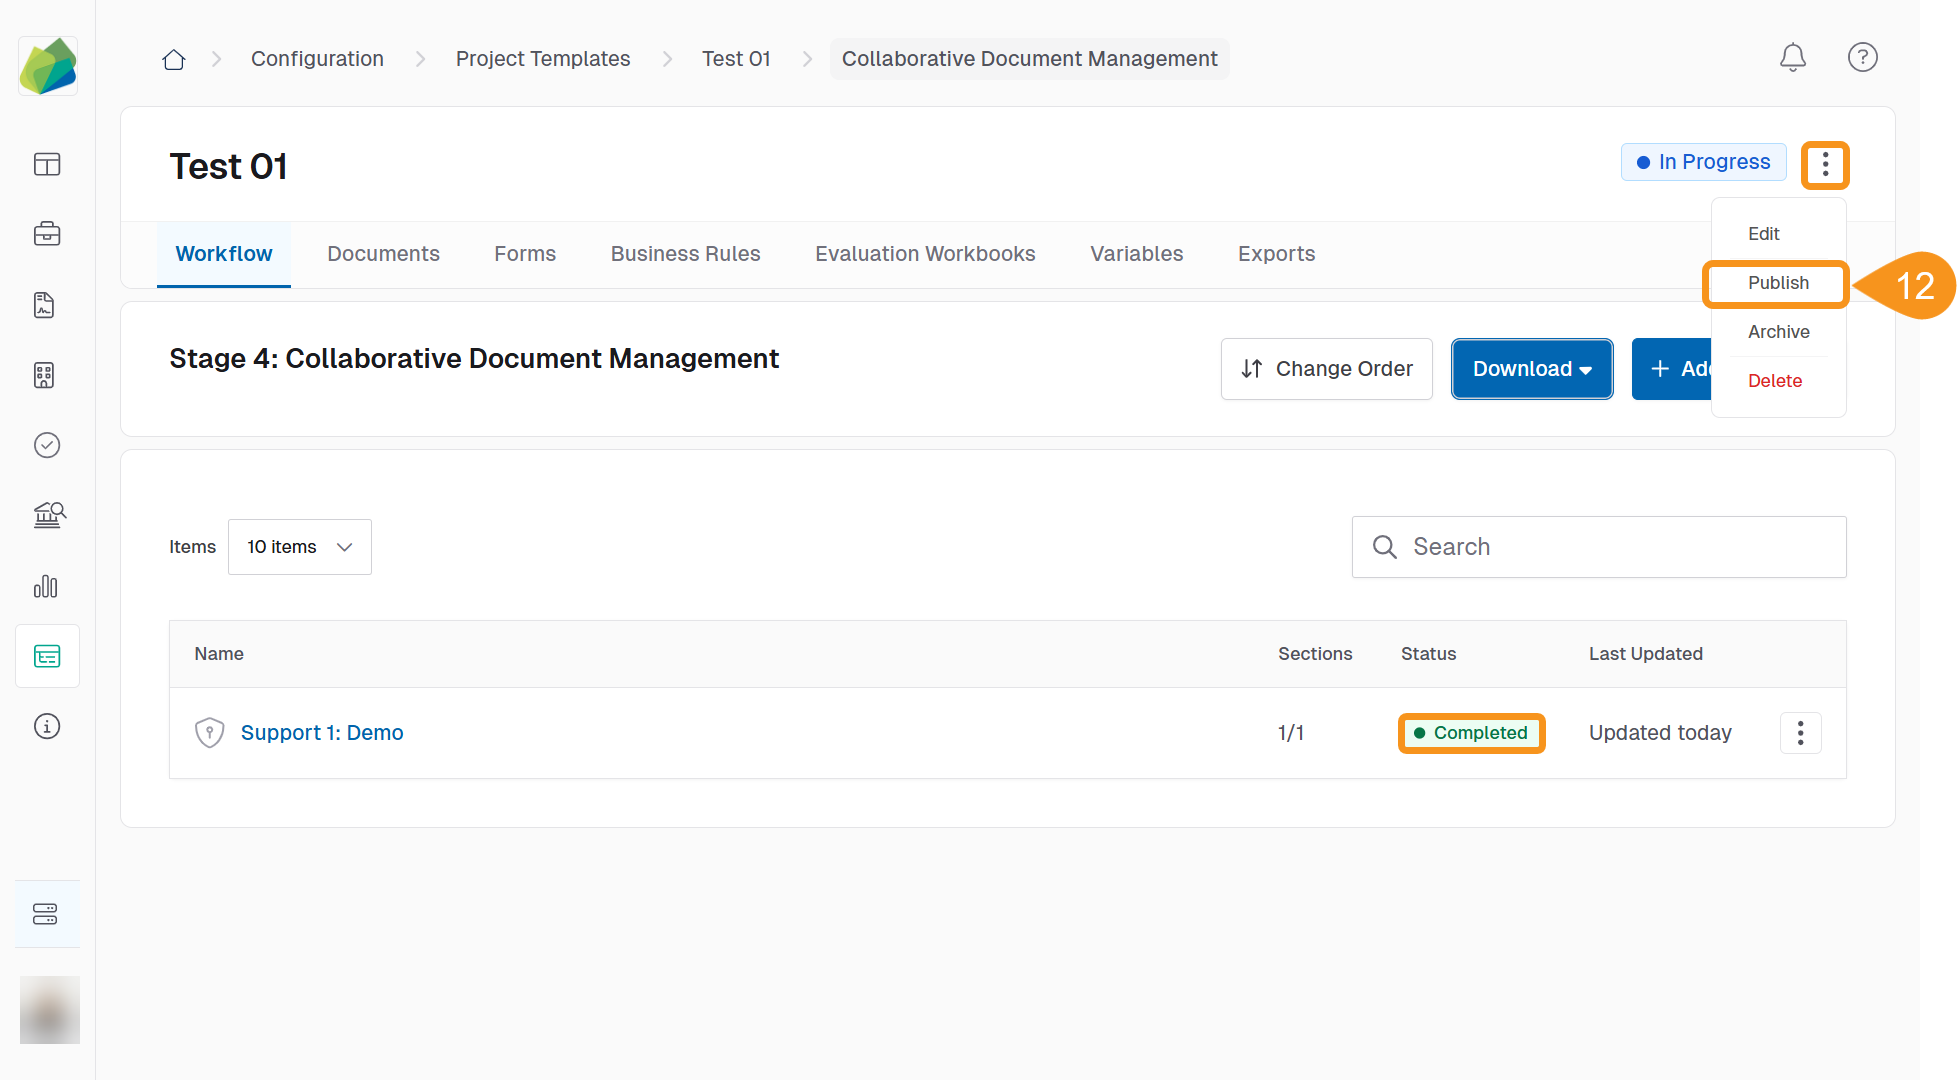
- Click the kebab menu (︙) in the project template and select Publish to finalize.
Tip
Use merge fields to reuse the same custom variable in multiple sections of the document without retyping values.
See Also
To complement your knowledge of this process, check the following pages: